Integrate Xero Seamlessly With ReadyTeam
This demo showcases how to integrate Readyteam with Xero to streamline your financial workflows
Go to app.readyteam.ai
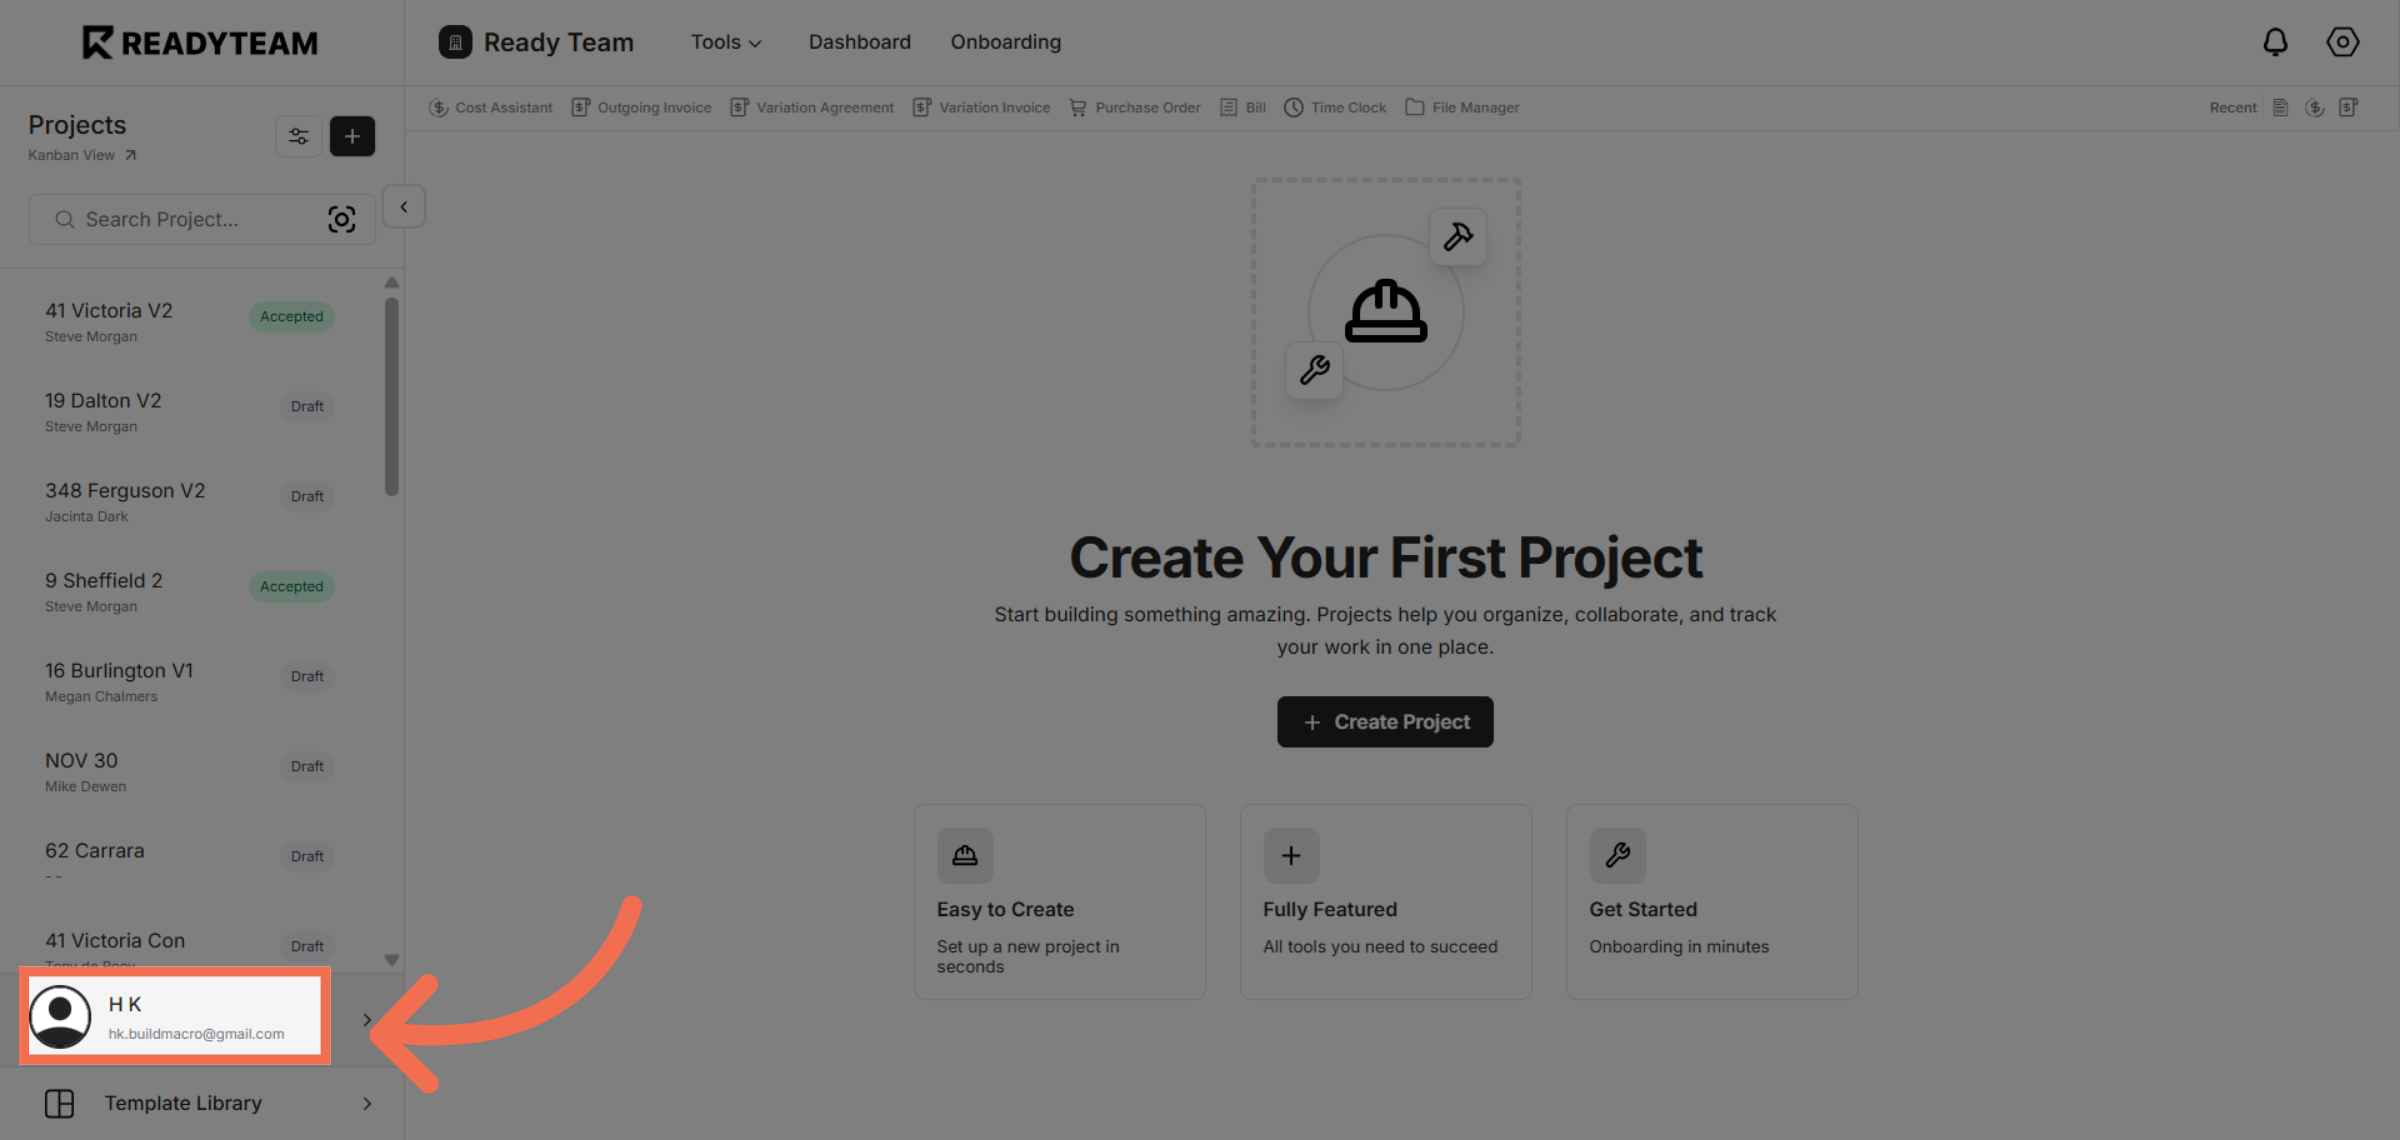
1. Select User Section
Click the user account to begin the integration process.
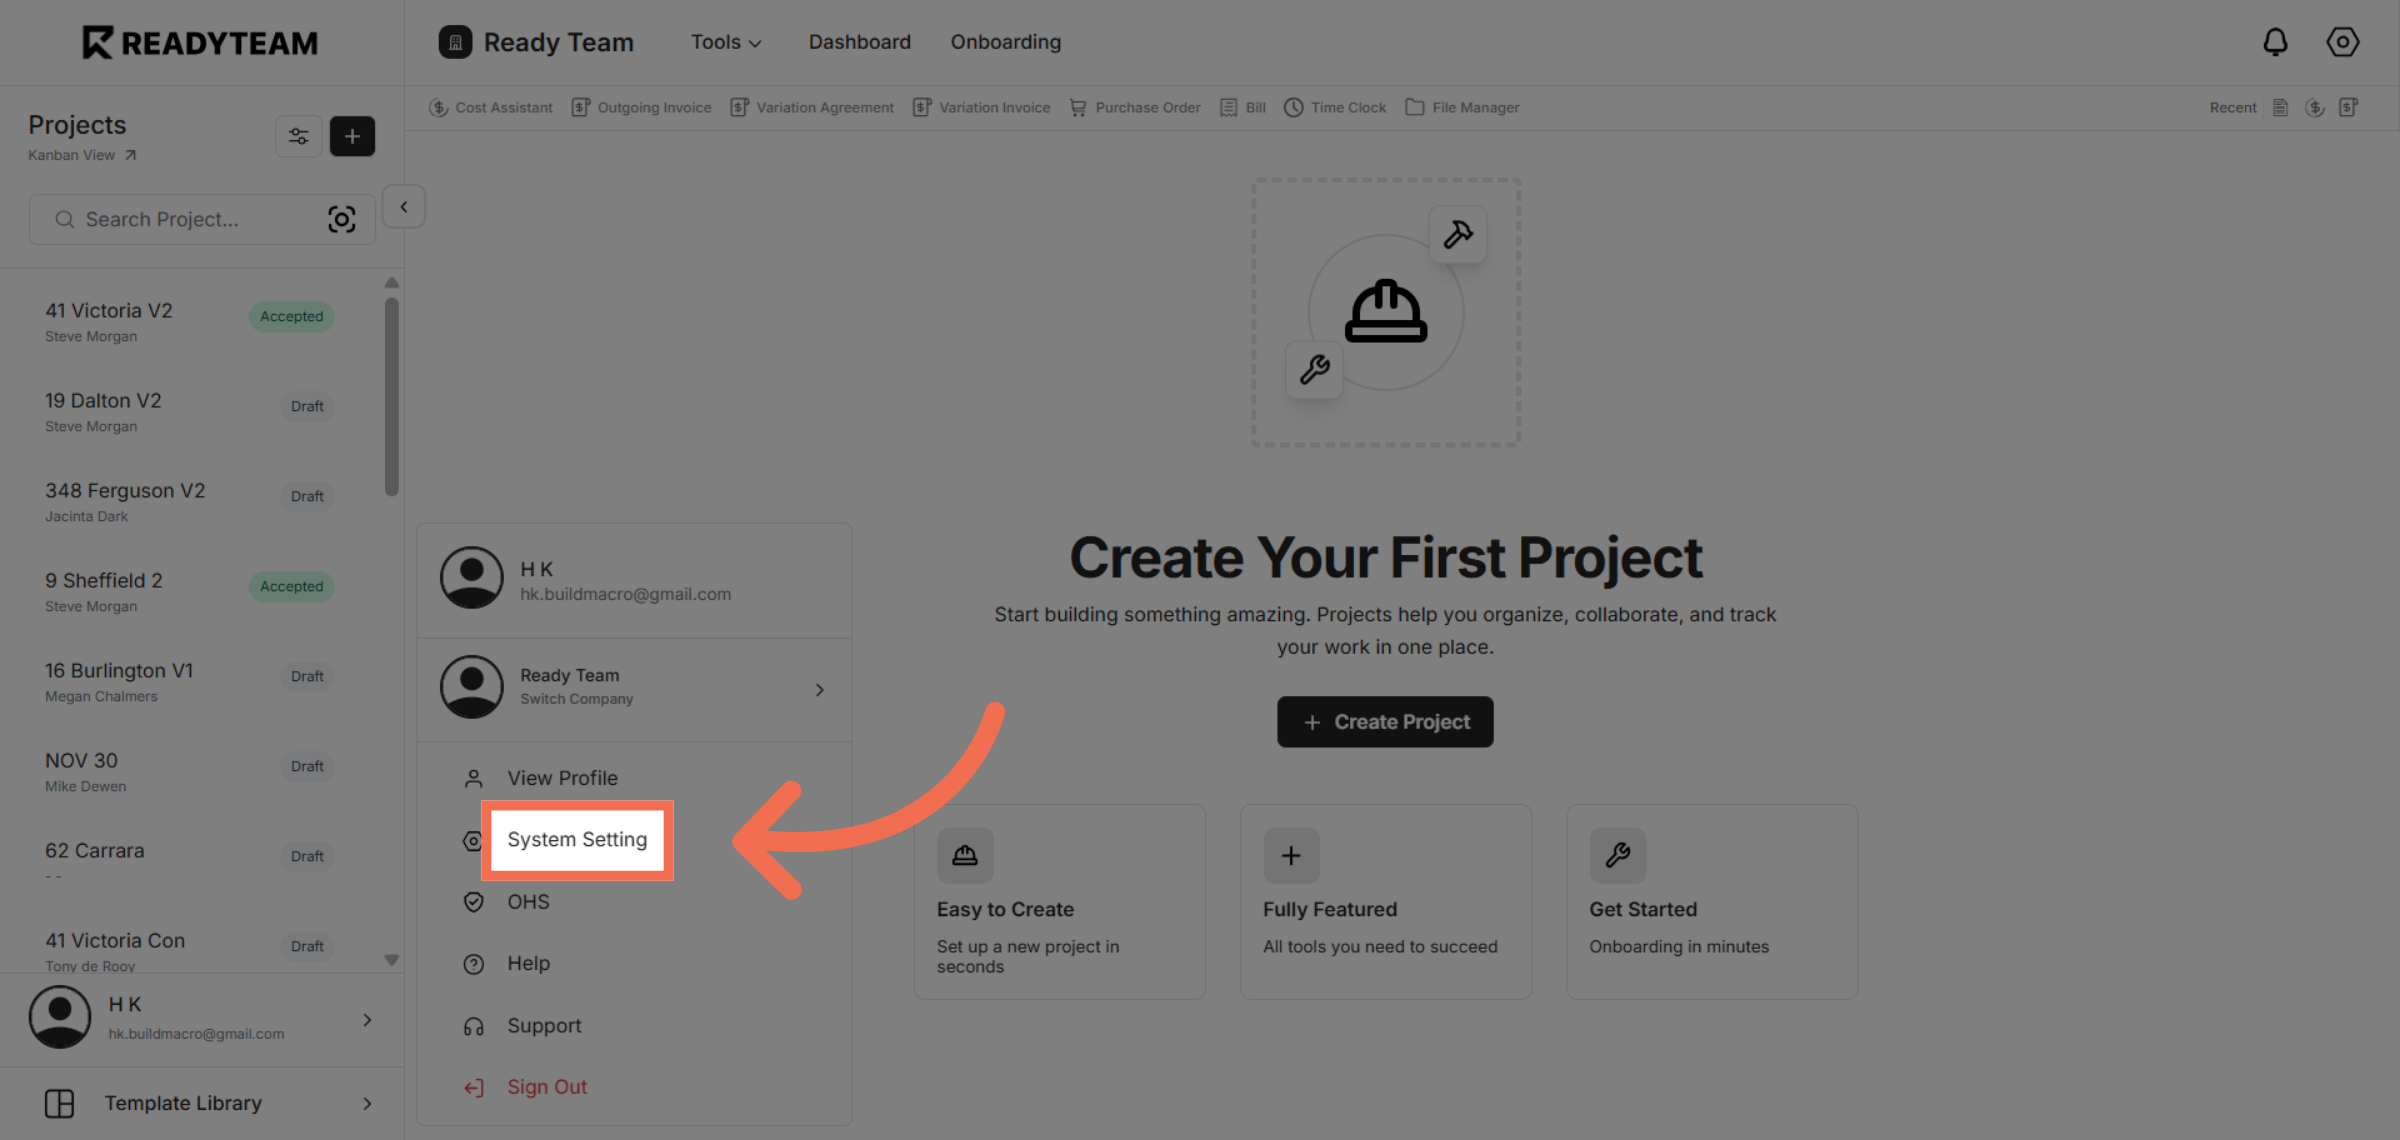
2. Open System Settings
Navigate to the System Setting section to access integration options.
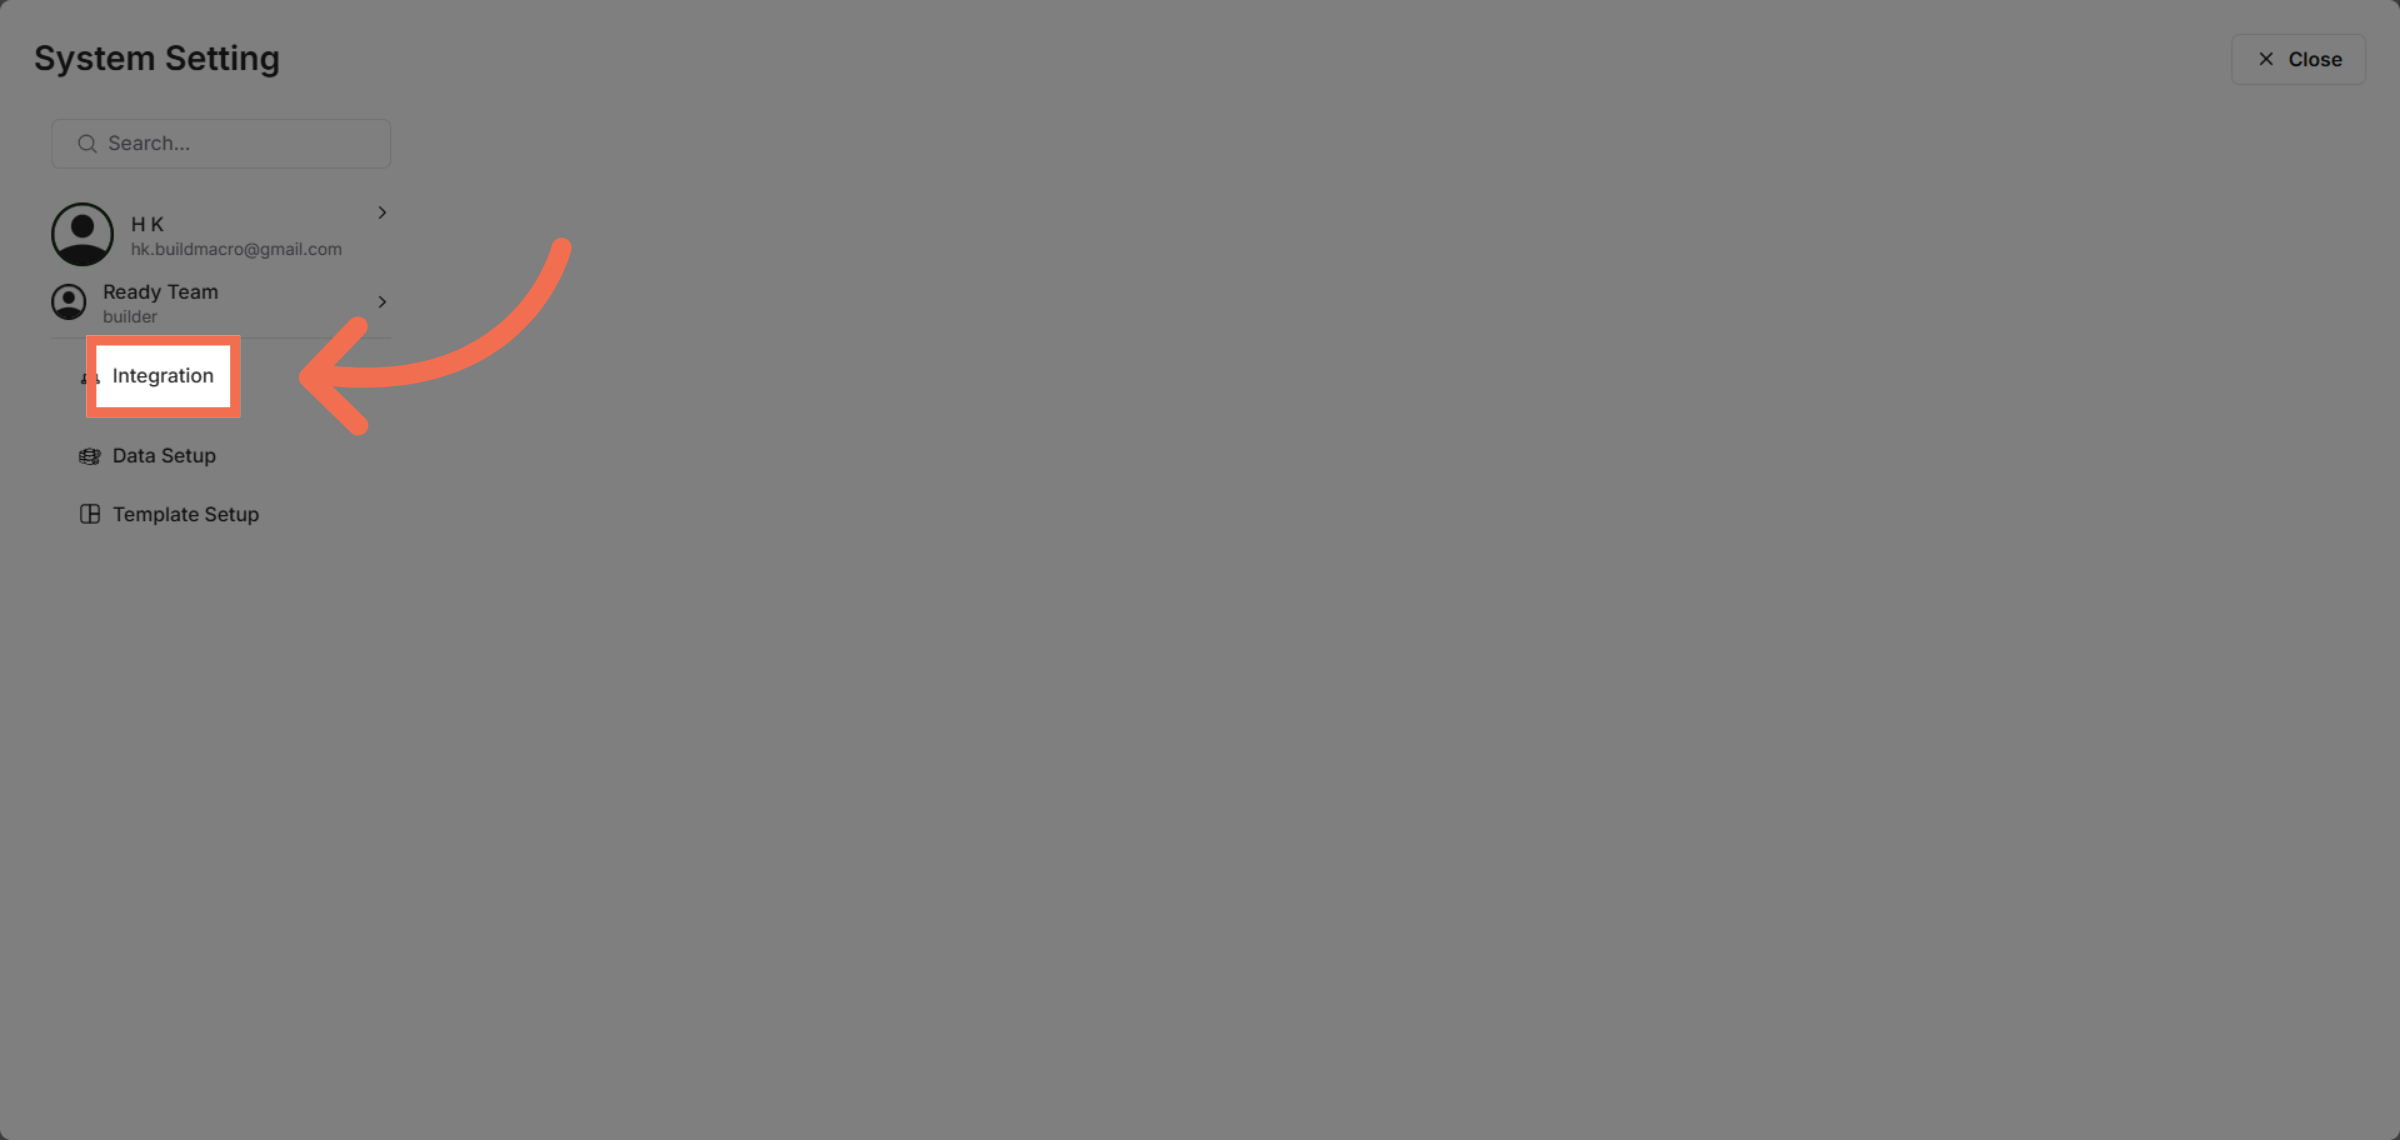
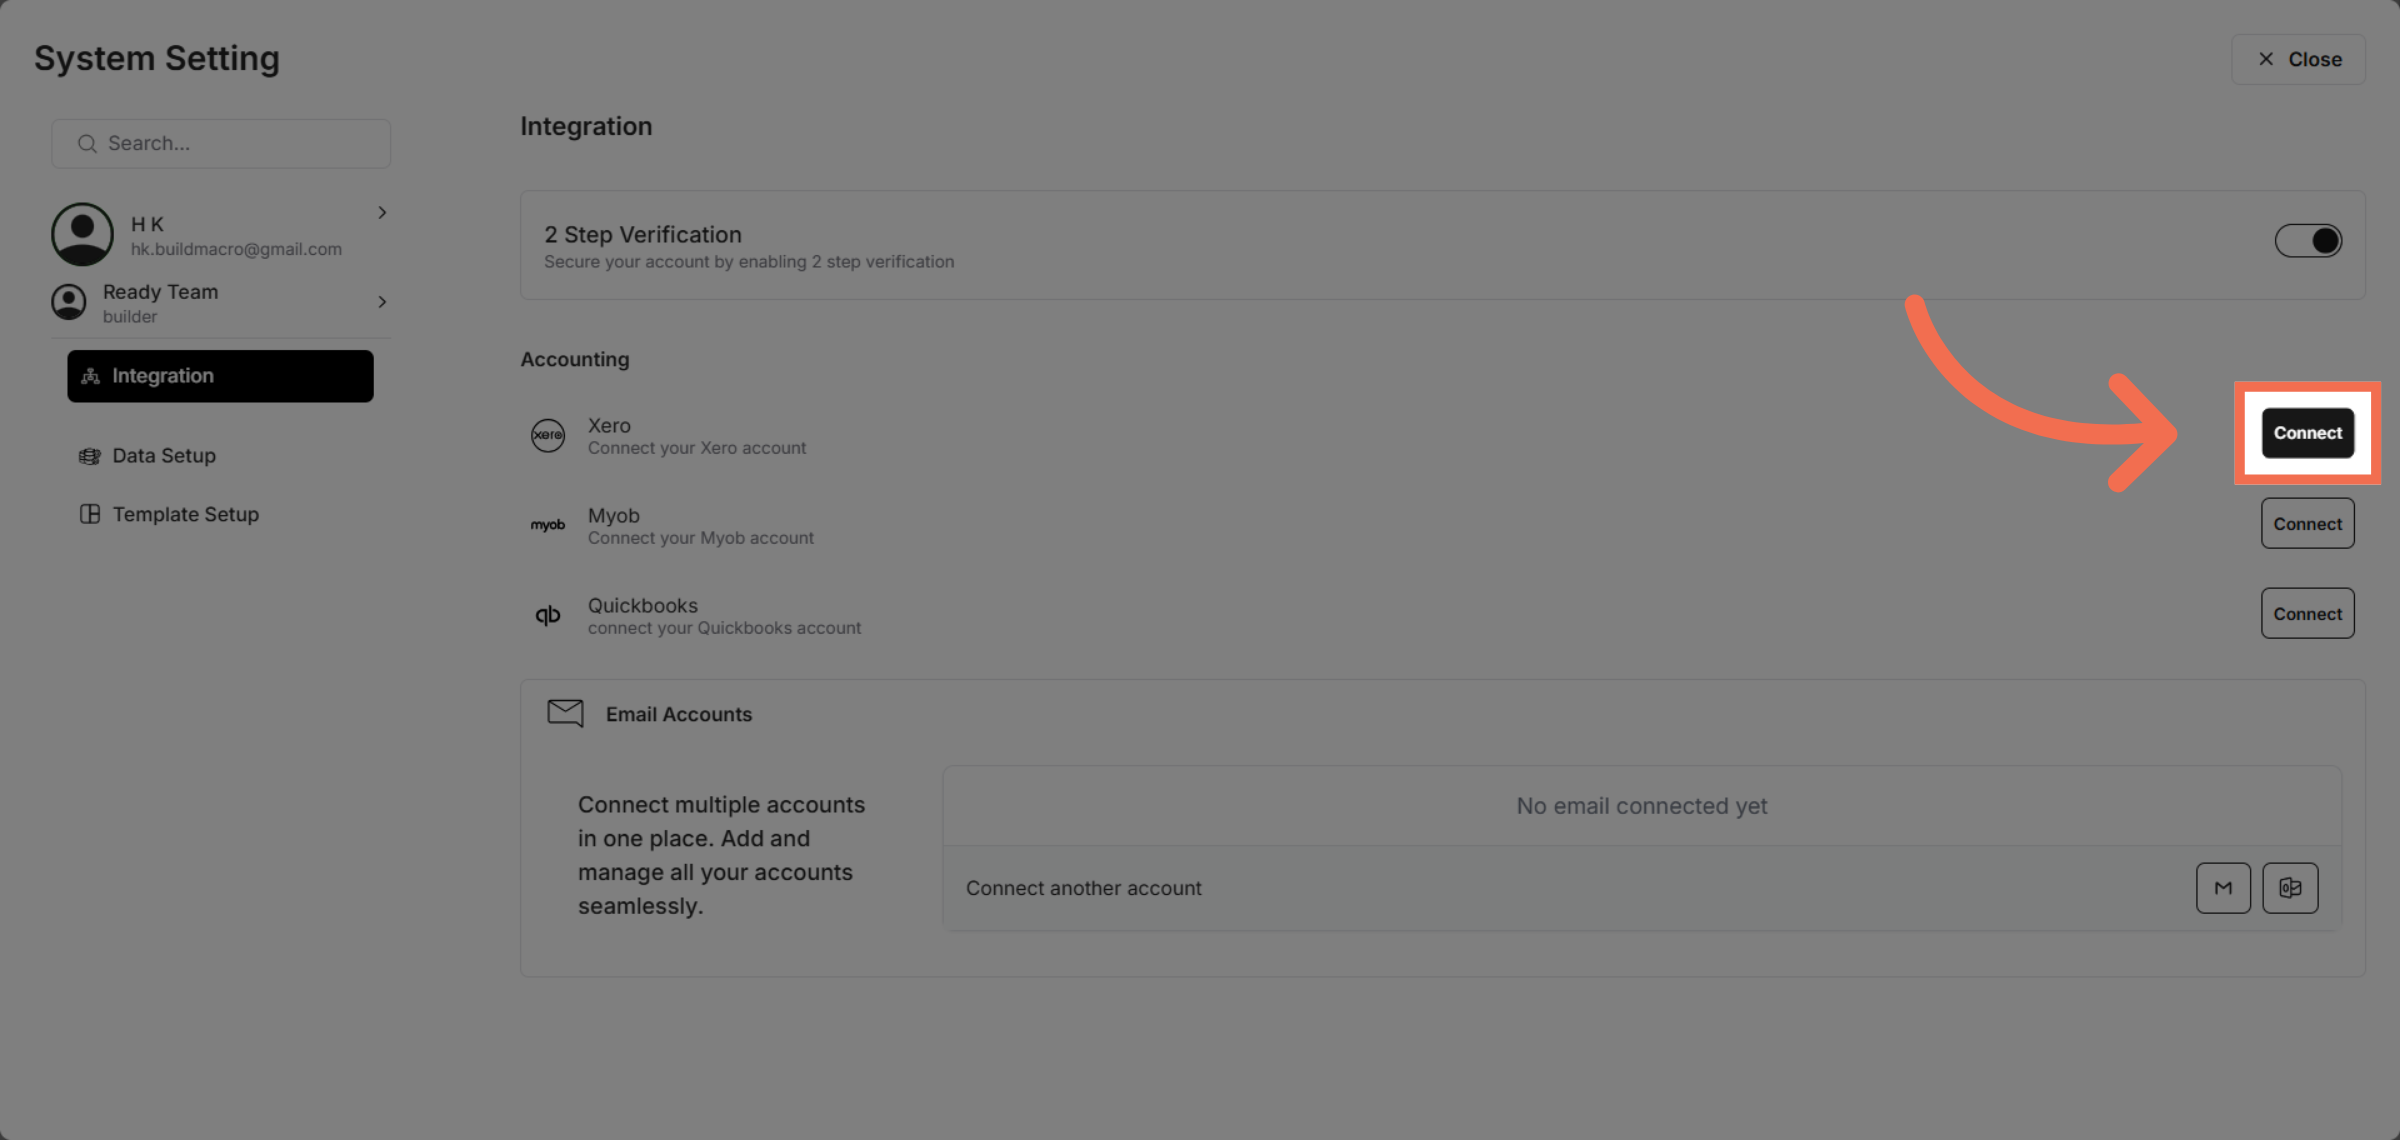
3. Access Integration Menu
Click on Integration to manage external service connections.
4. Initiate Connection
Click Connect to start linking Readyteam with Xero.
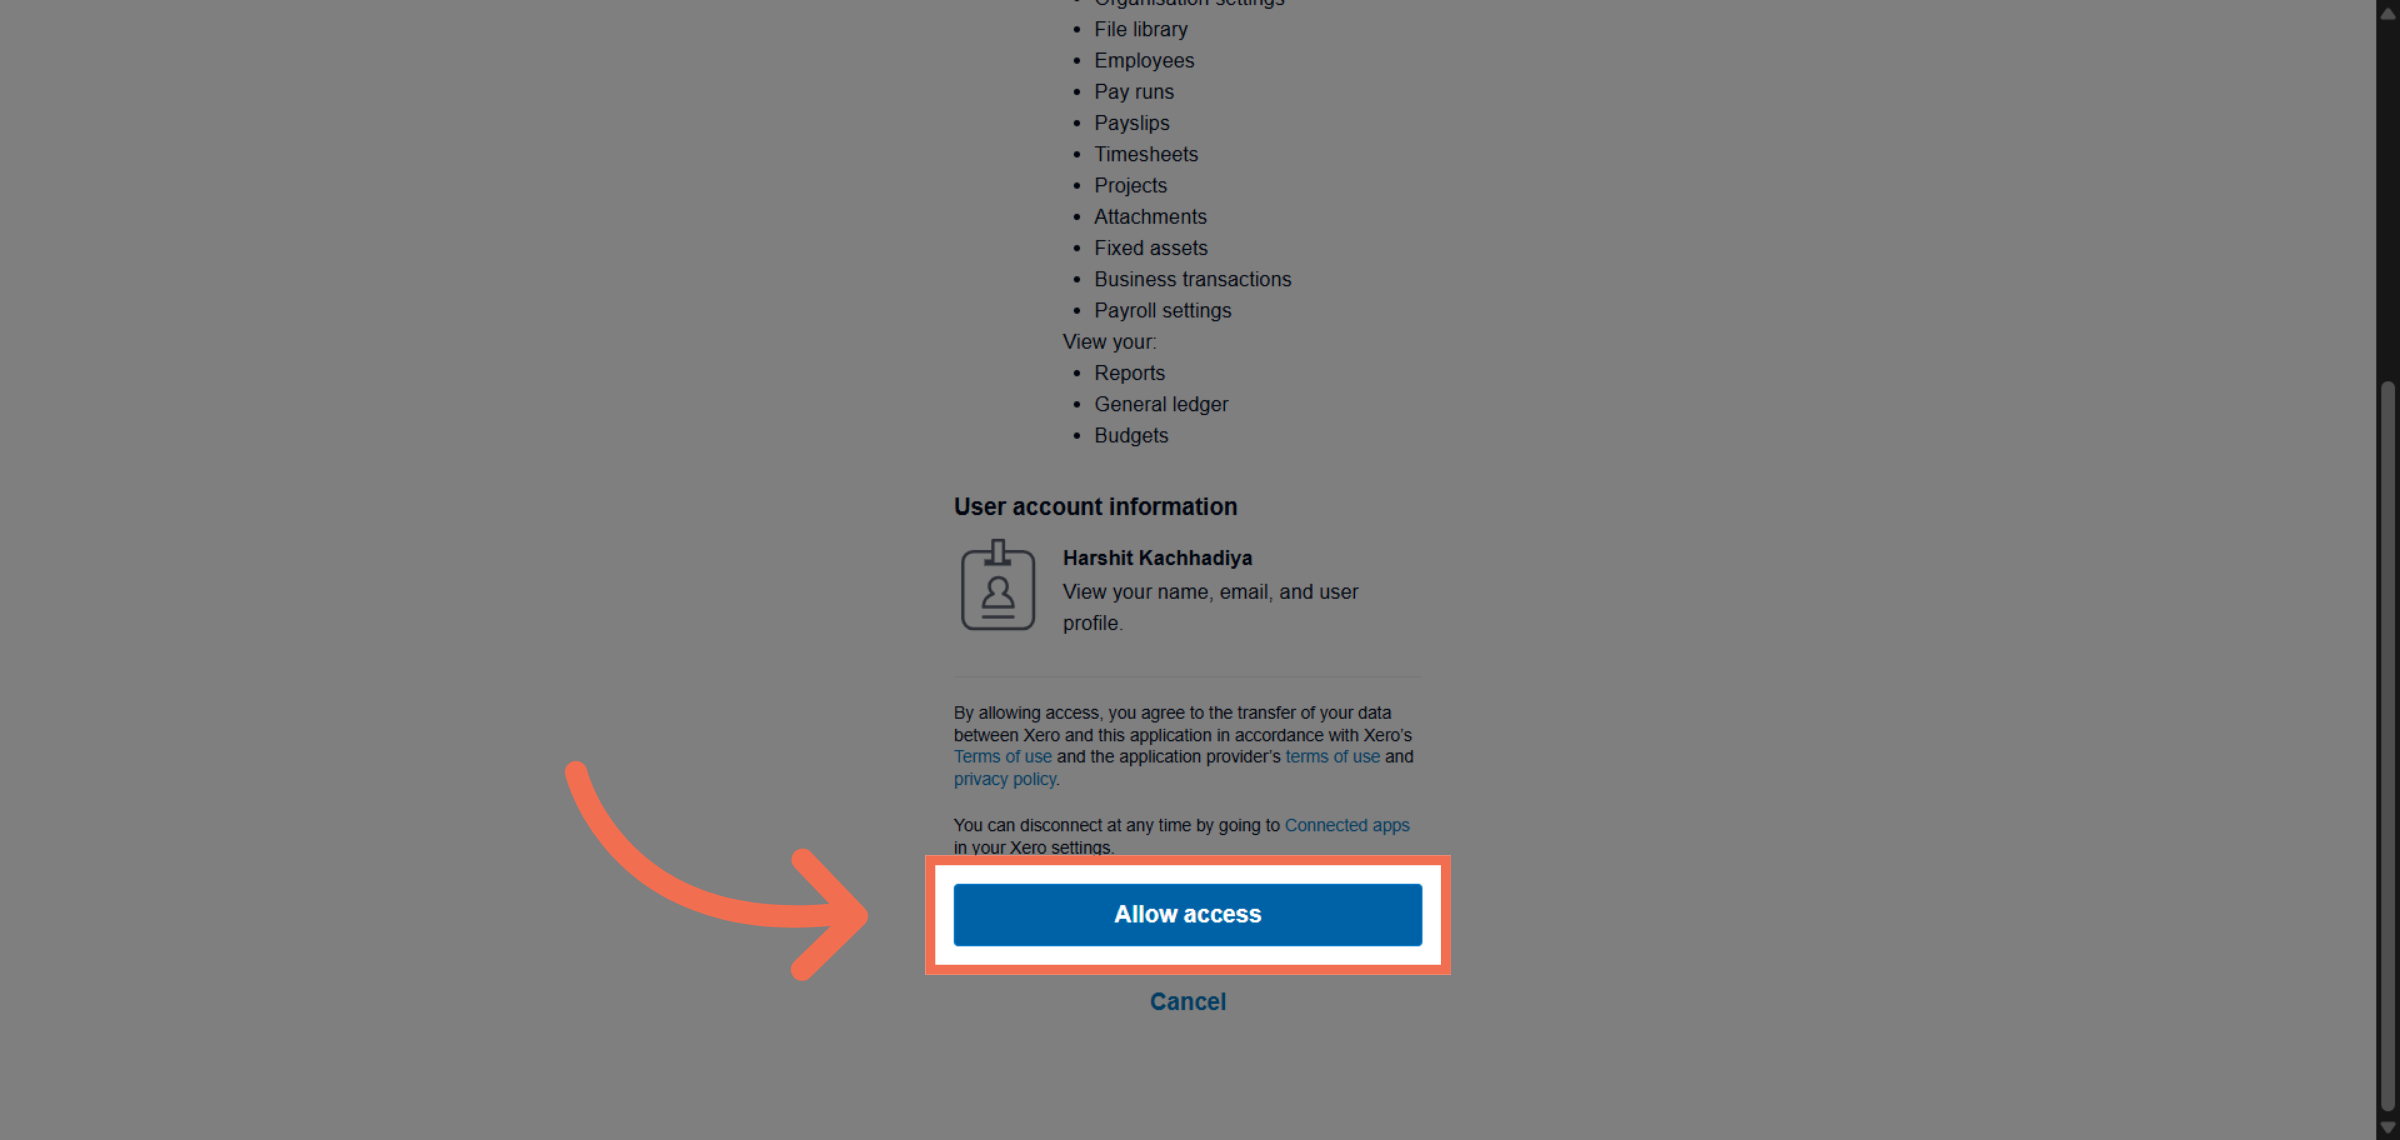
5. Allow Access to Xero
Click Allow access to authorize Readyteam to interact with your Xero account.
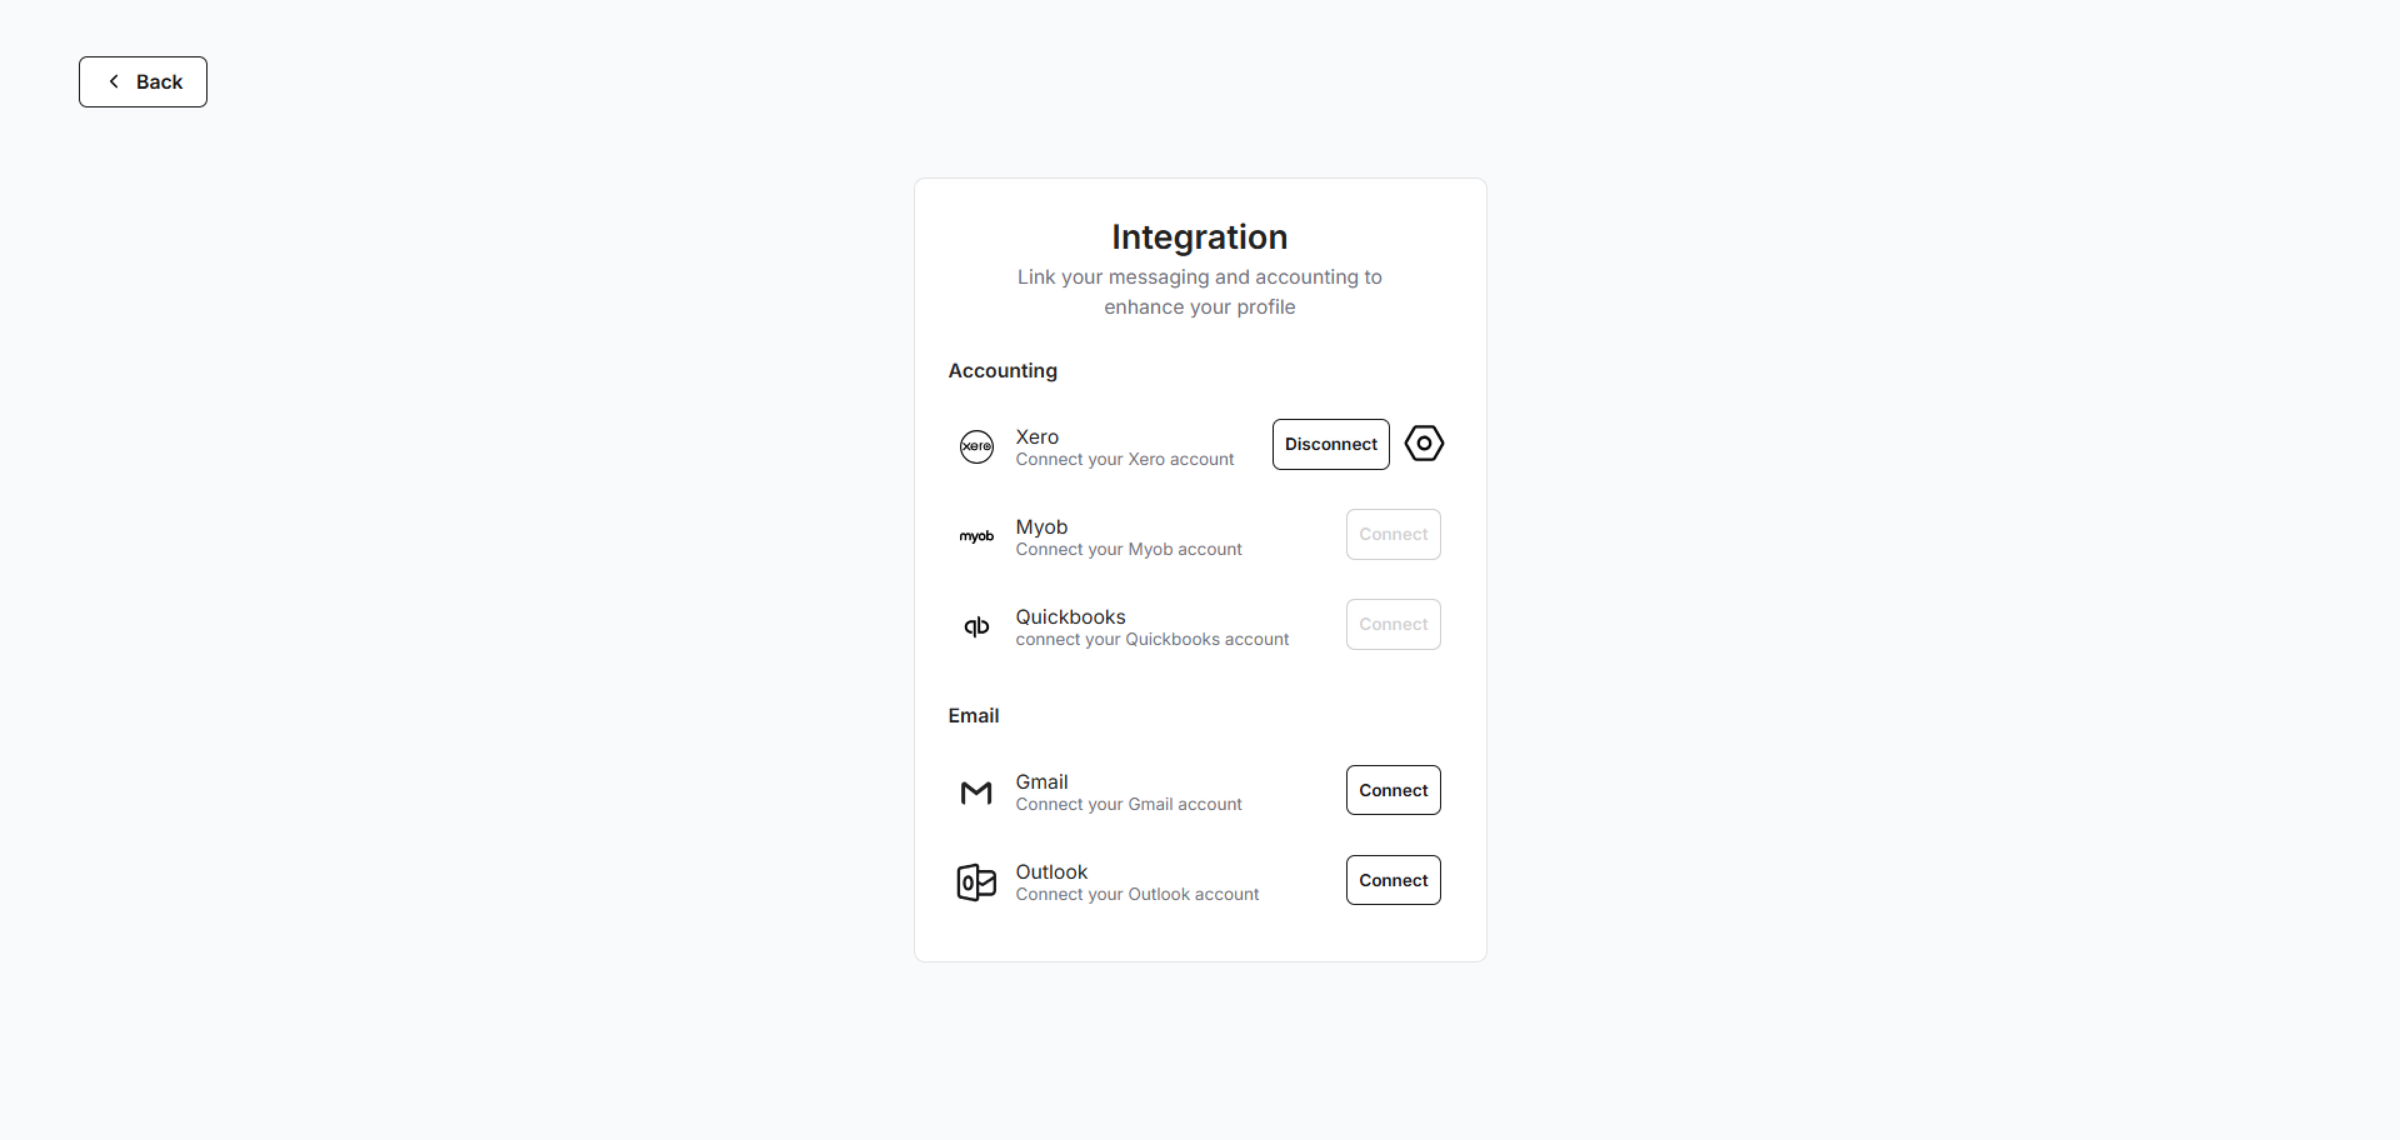
6. Return to Readyteam Platform
Switch back to the Readyteam application to continue setup.
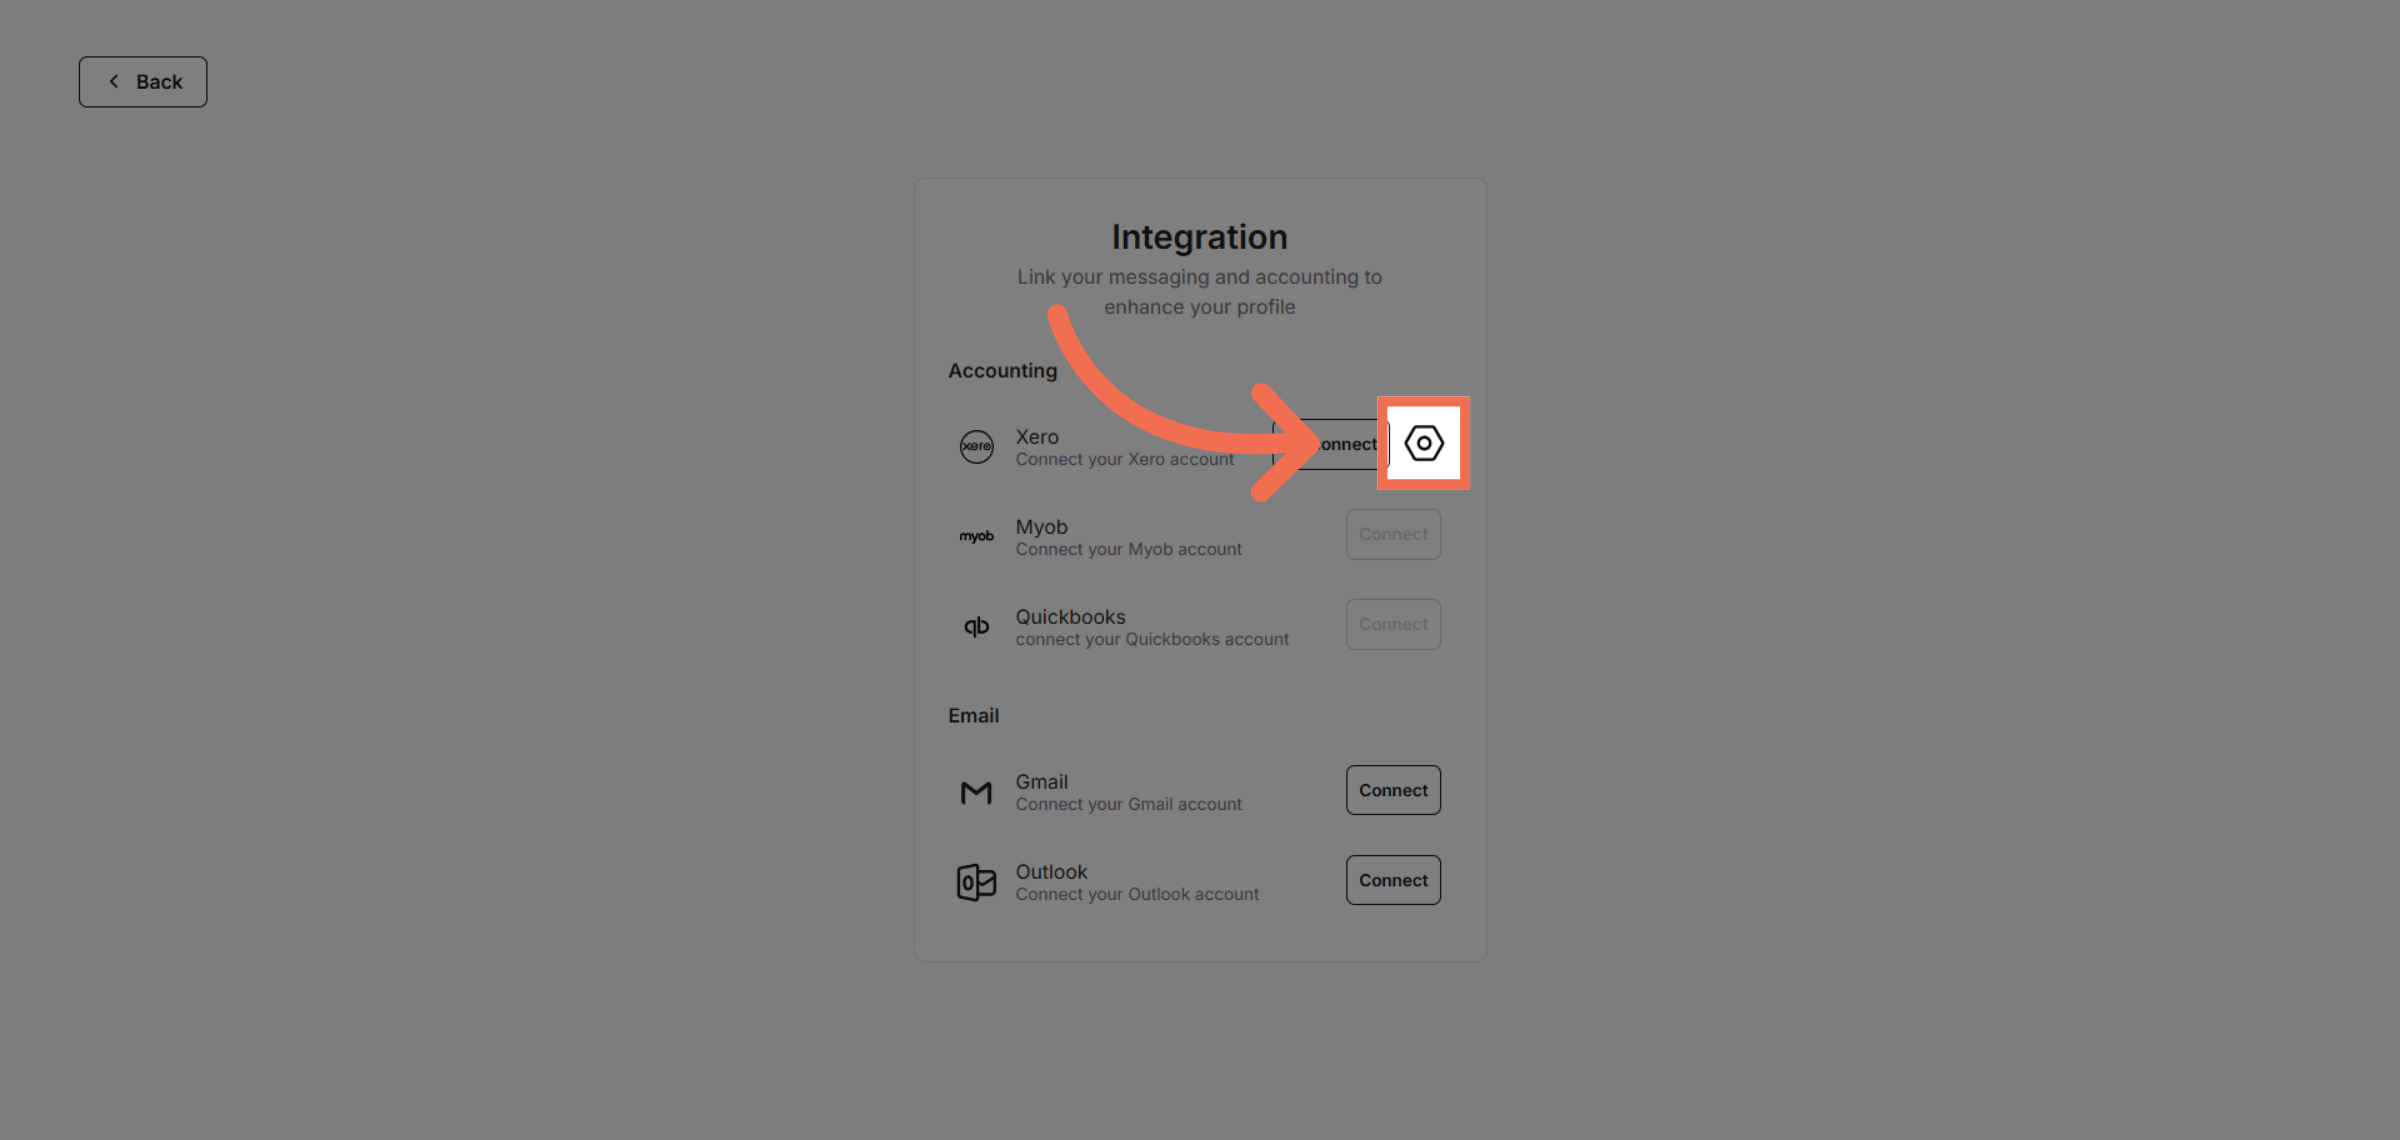
7. Open Integration Options
Click here to access integration options within Readyteam.
8. Open Tenants Options
Click here to proceed with integration configuration steps.
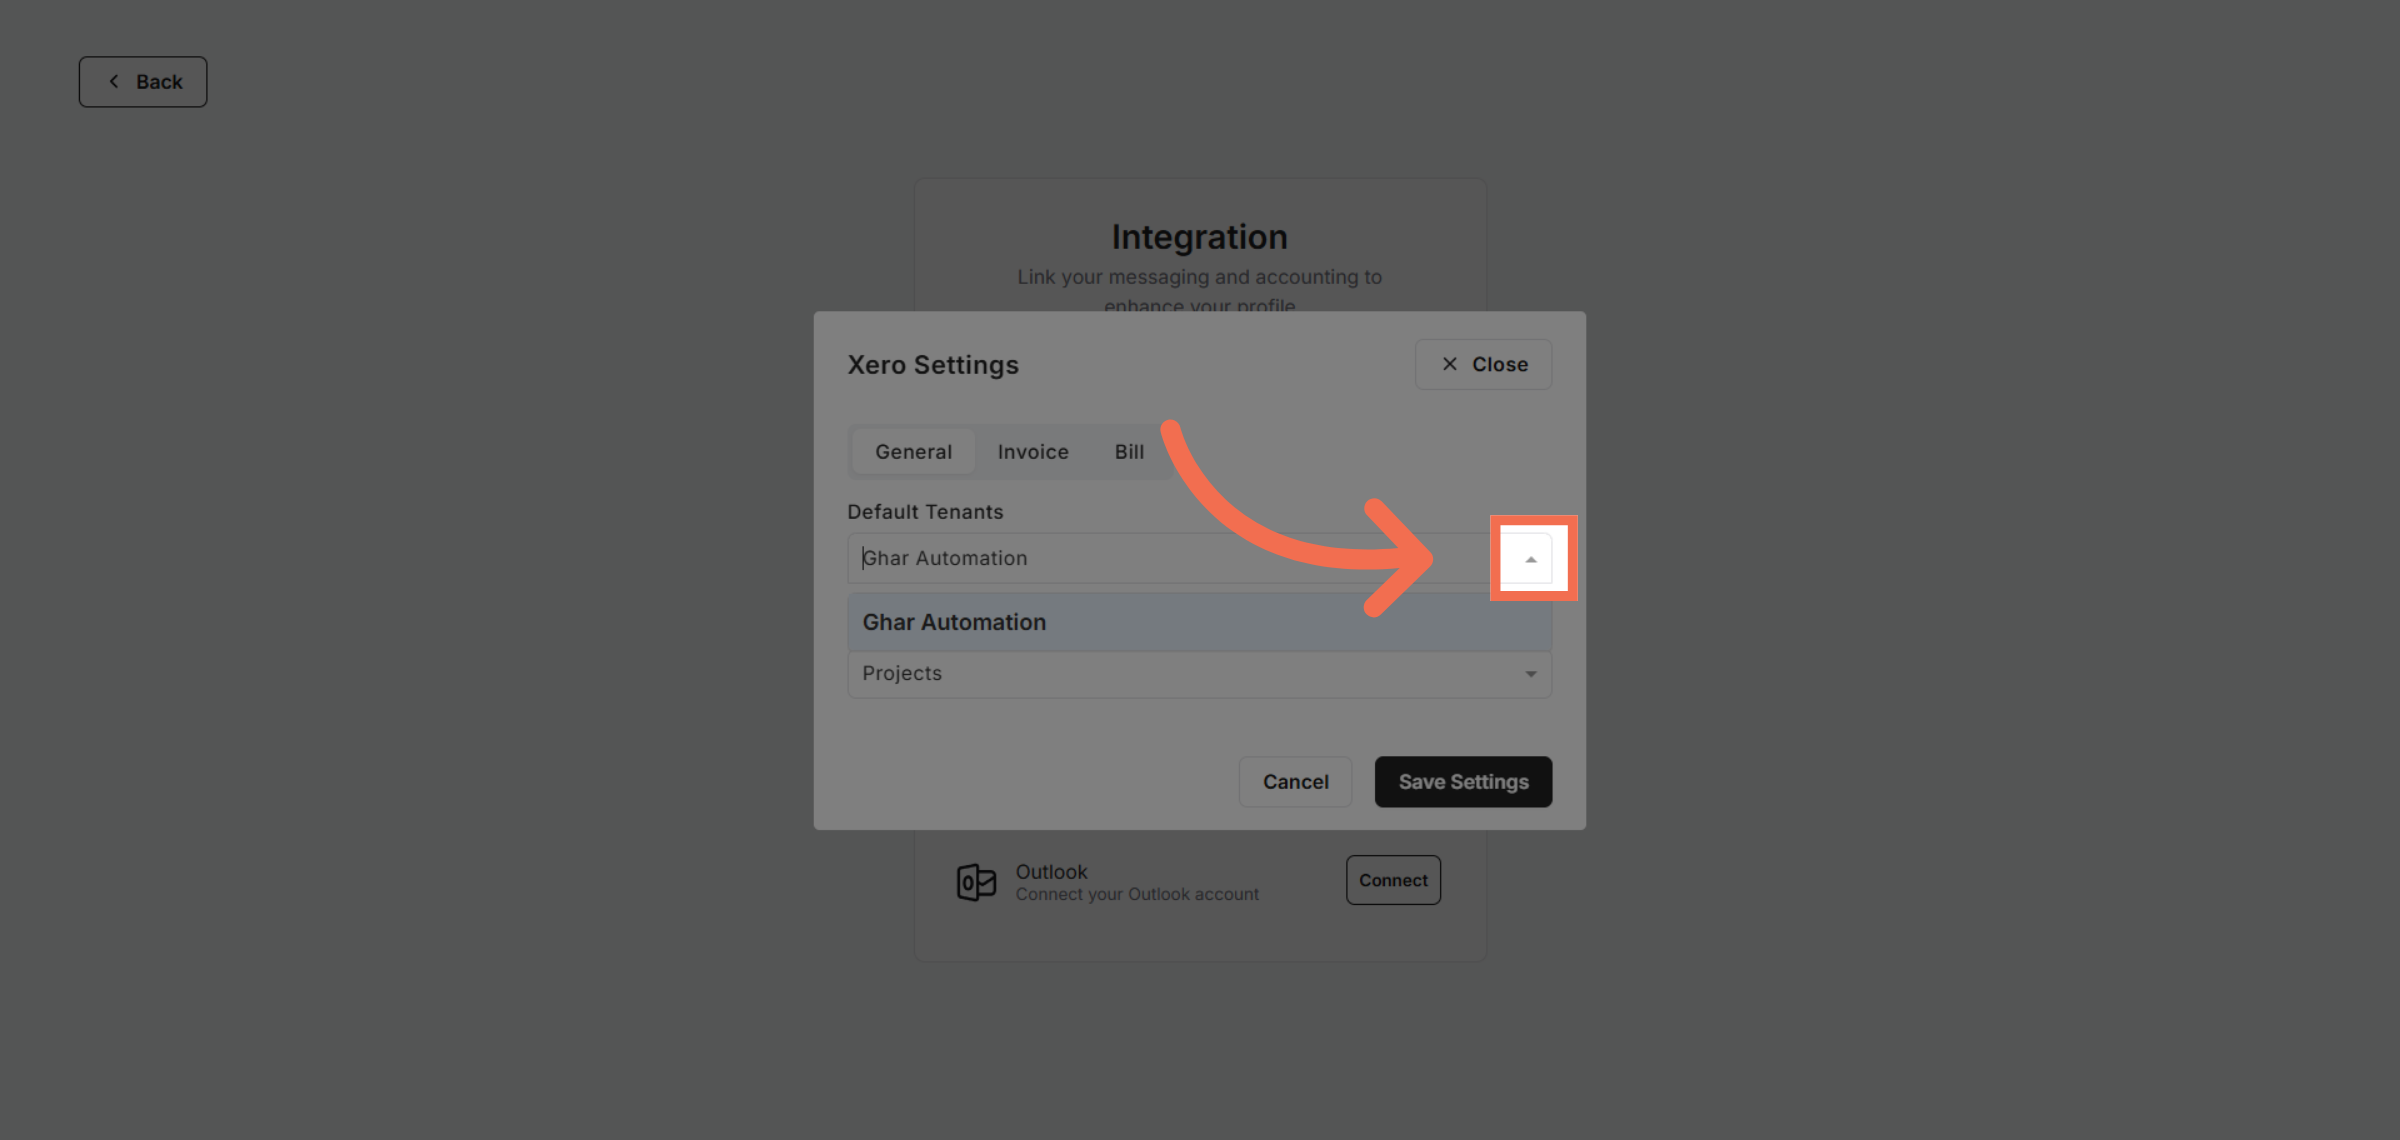
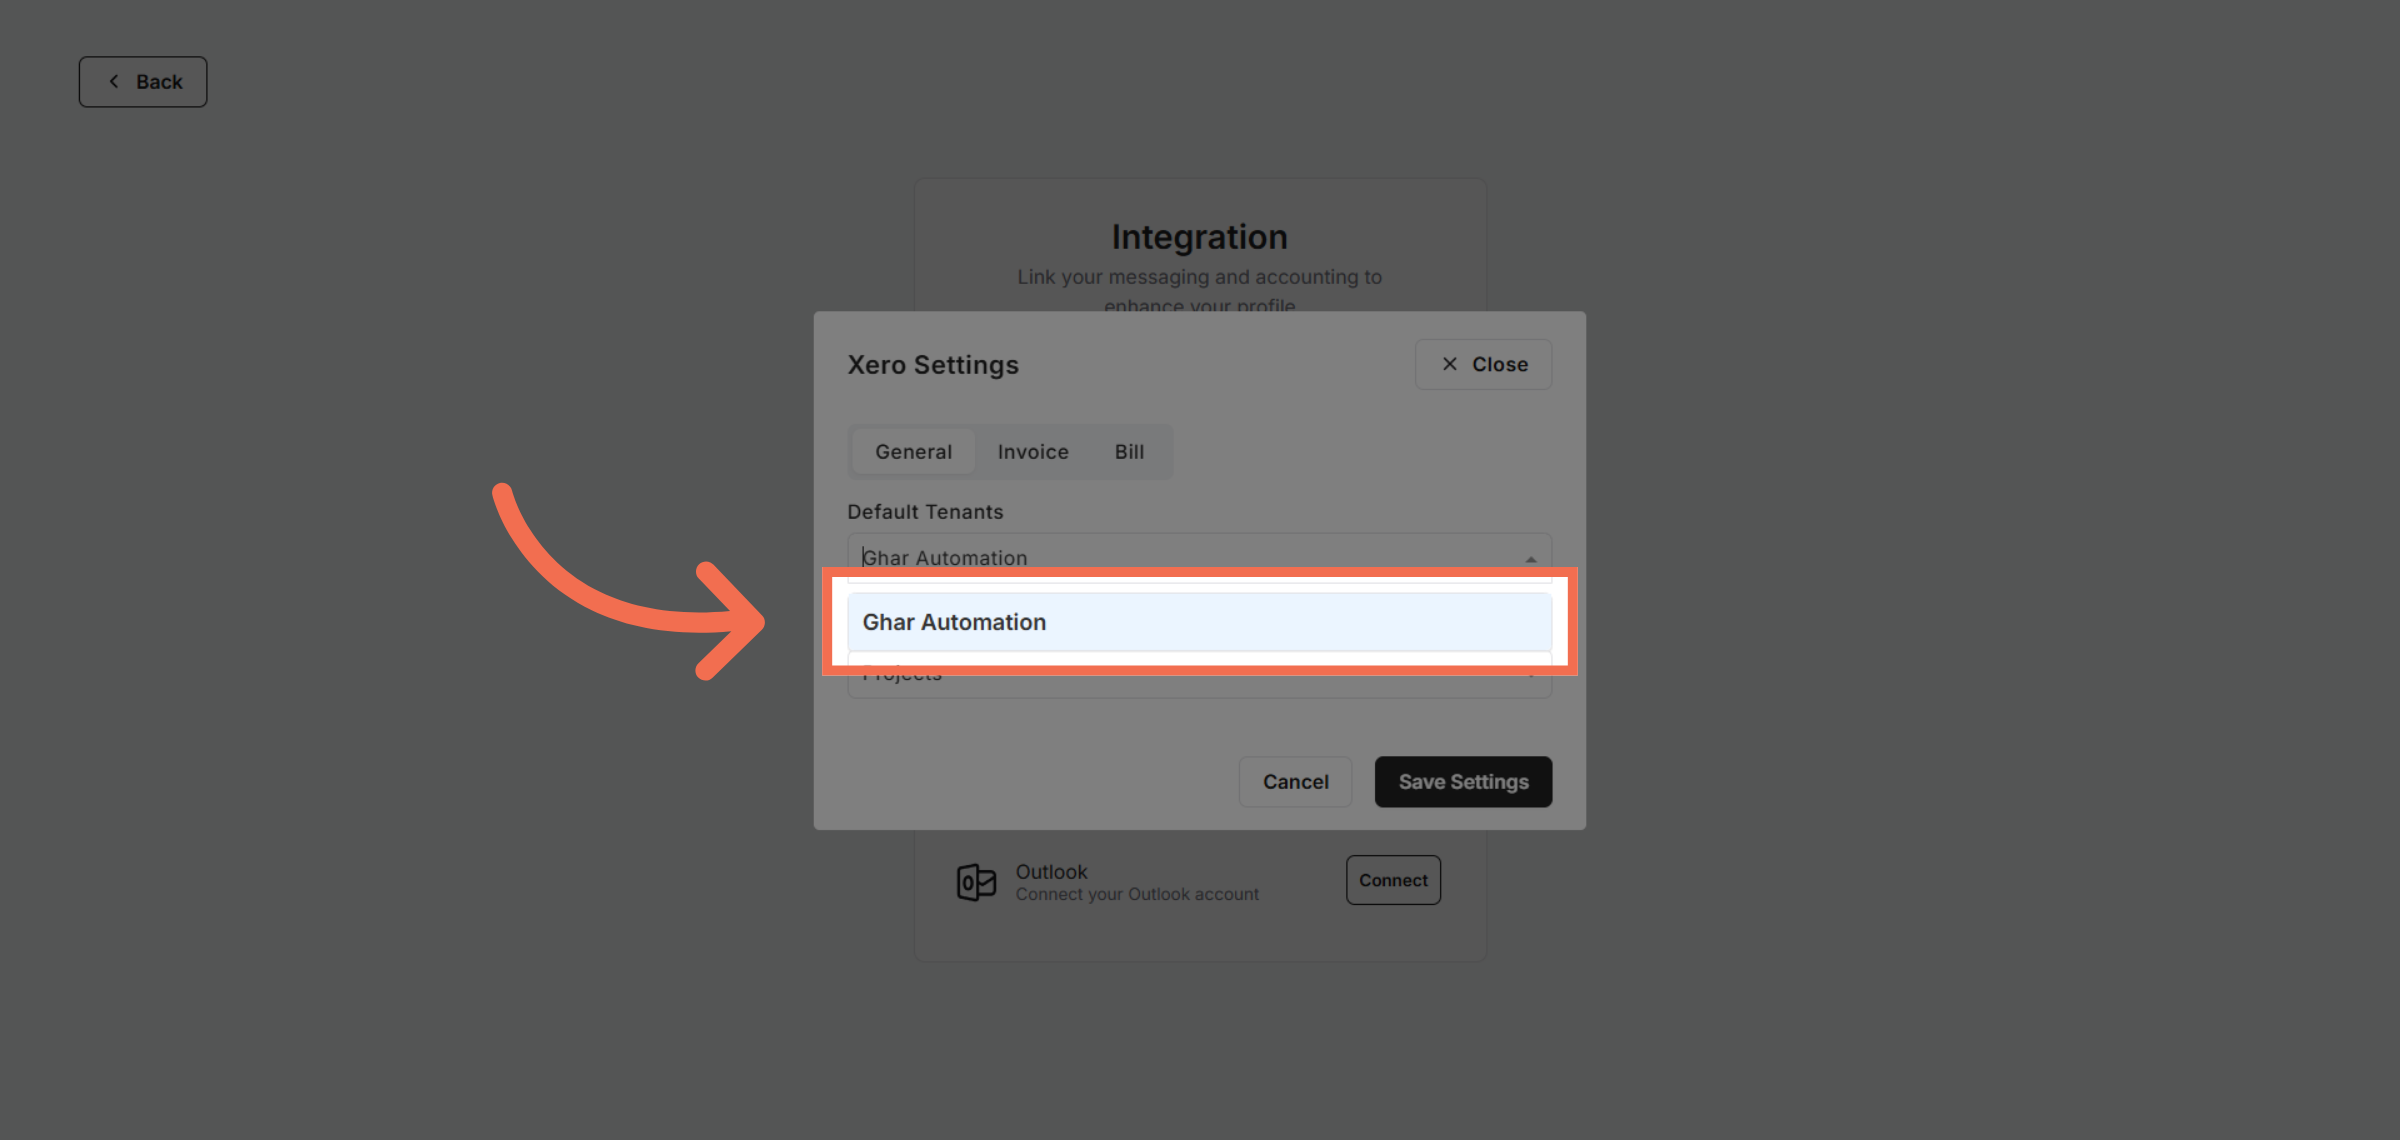
9. Select Tenants
Click the project account to link it with Xero for data synchronization.
10. Option Tracking Category Options
Click here to open project-specific settings for integration.
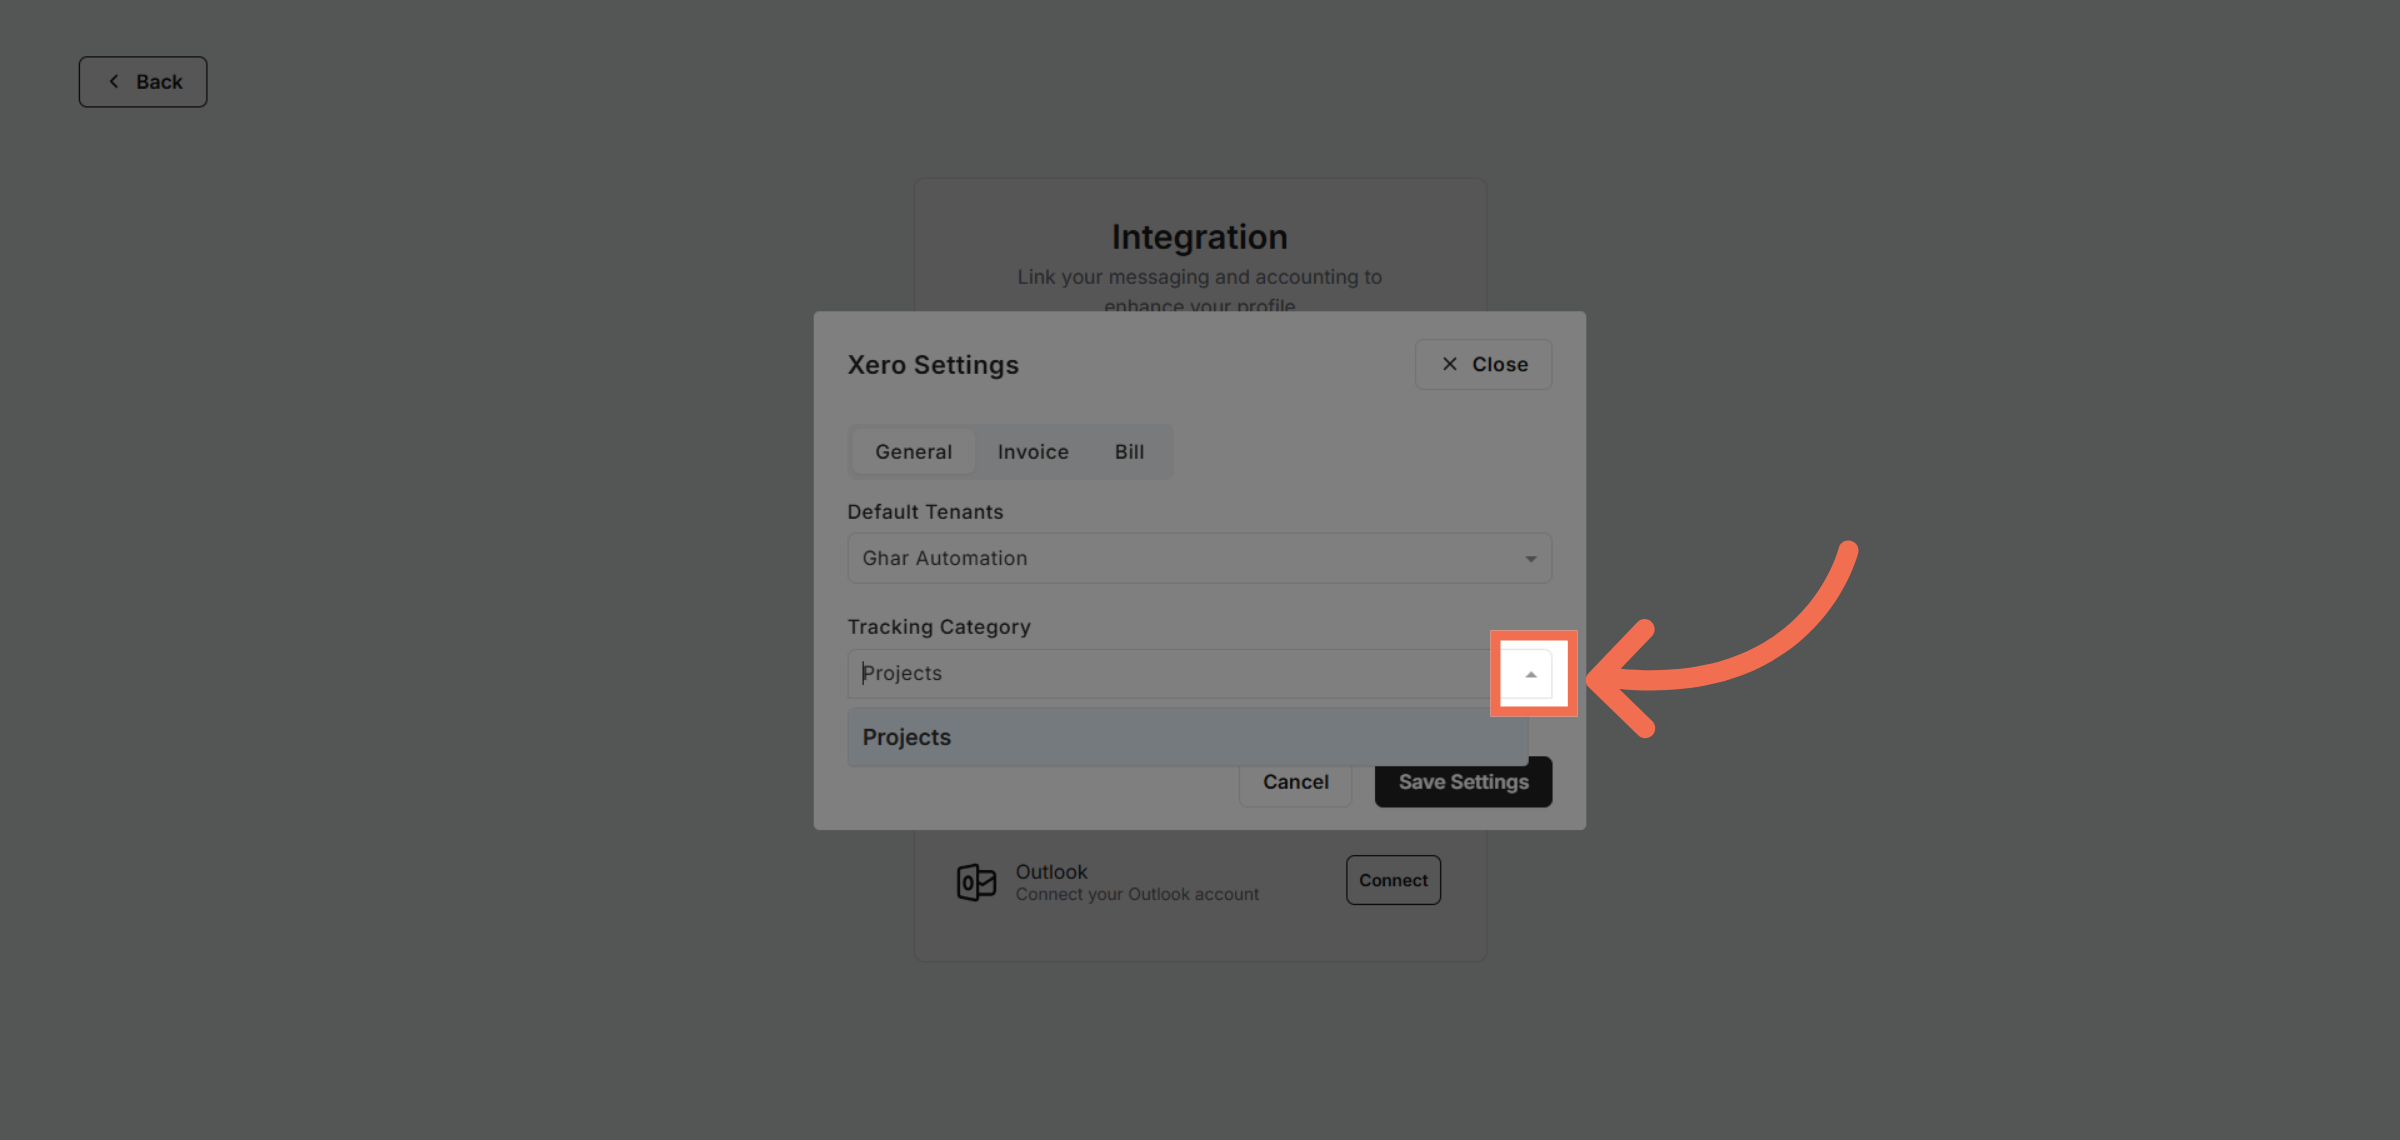
11. Select Tracking Category
Click Projects to view and manage your project details.

12. Access Invoice Settings
Click Invoice to configure billing and invoicing options.

13. Open Invoice Account Options
Click here to view detailed invoice settings.
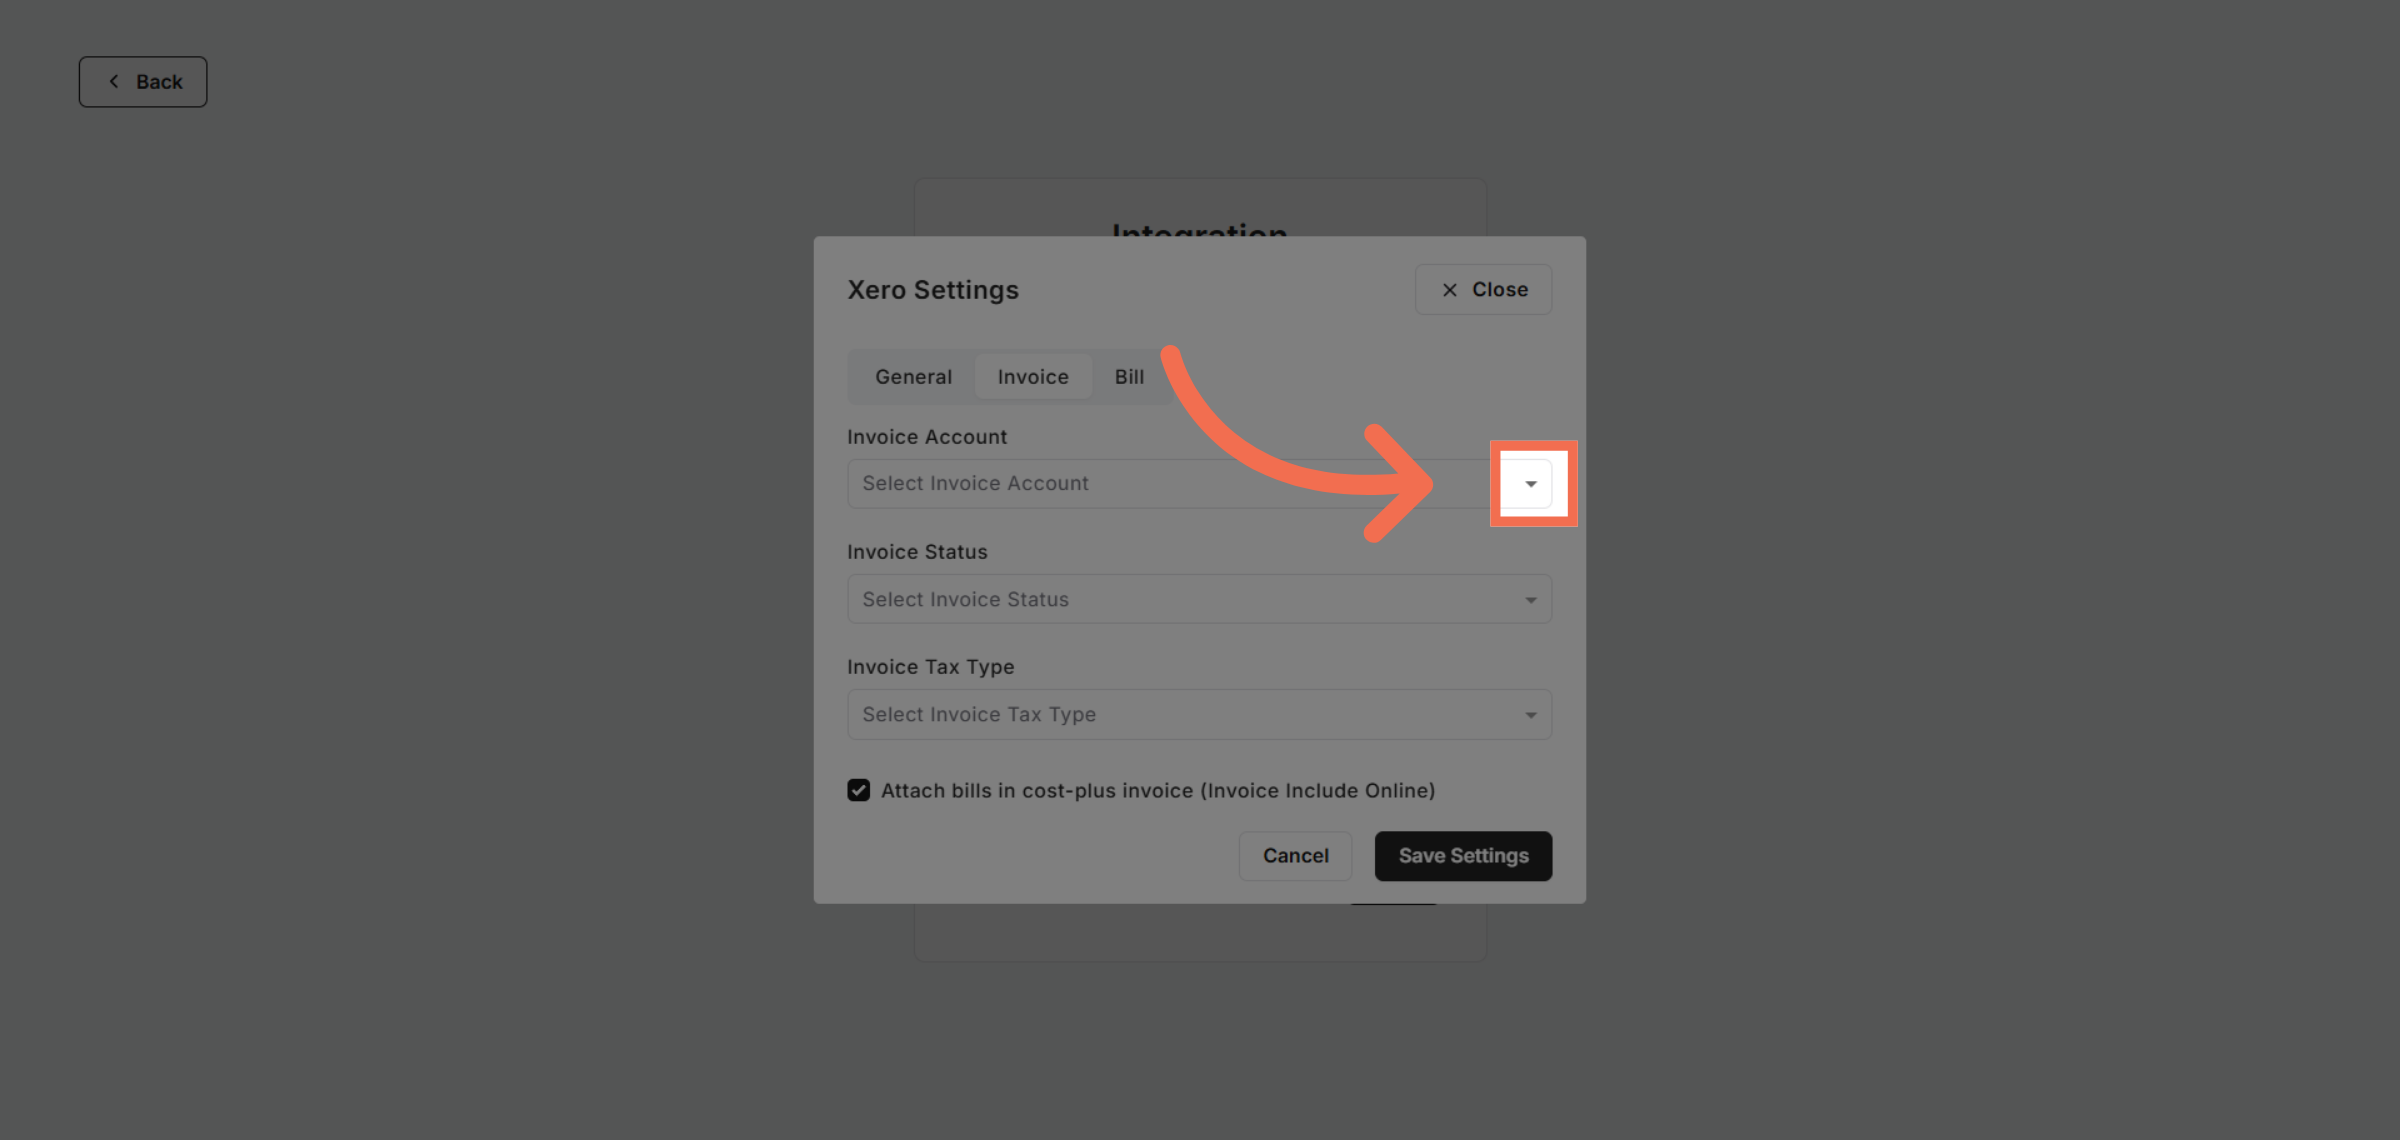
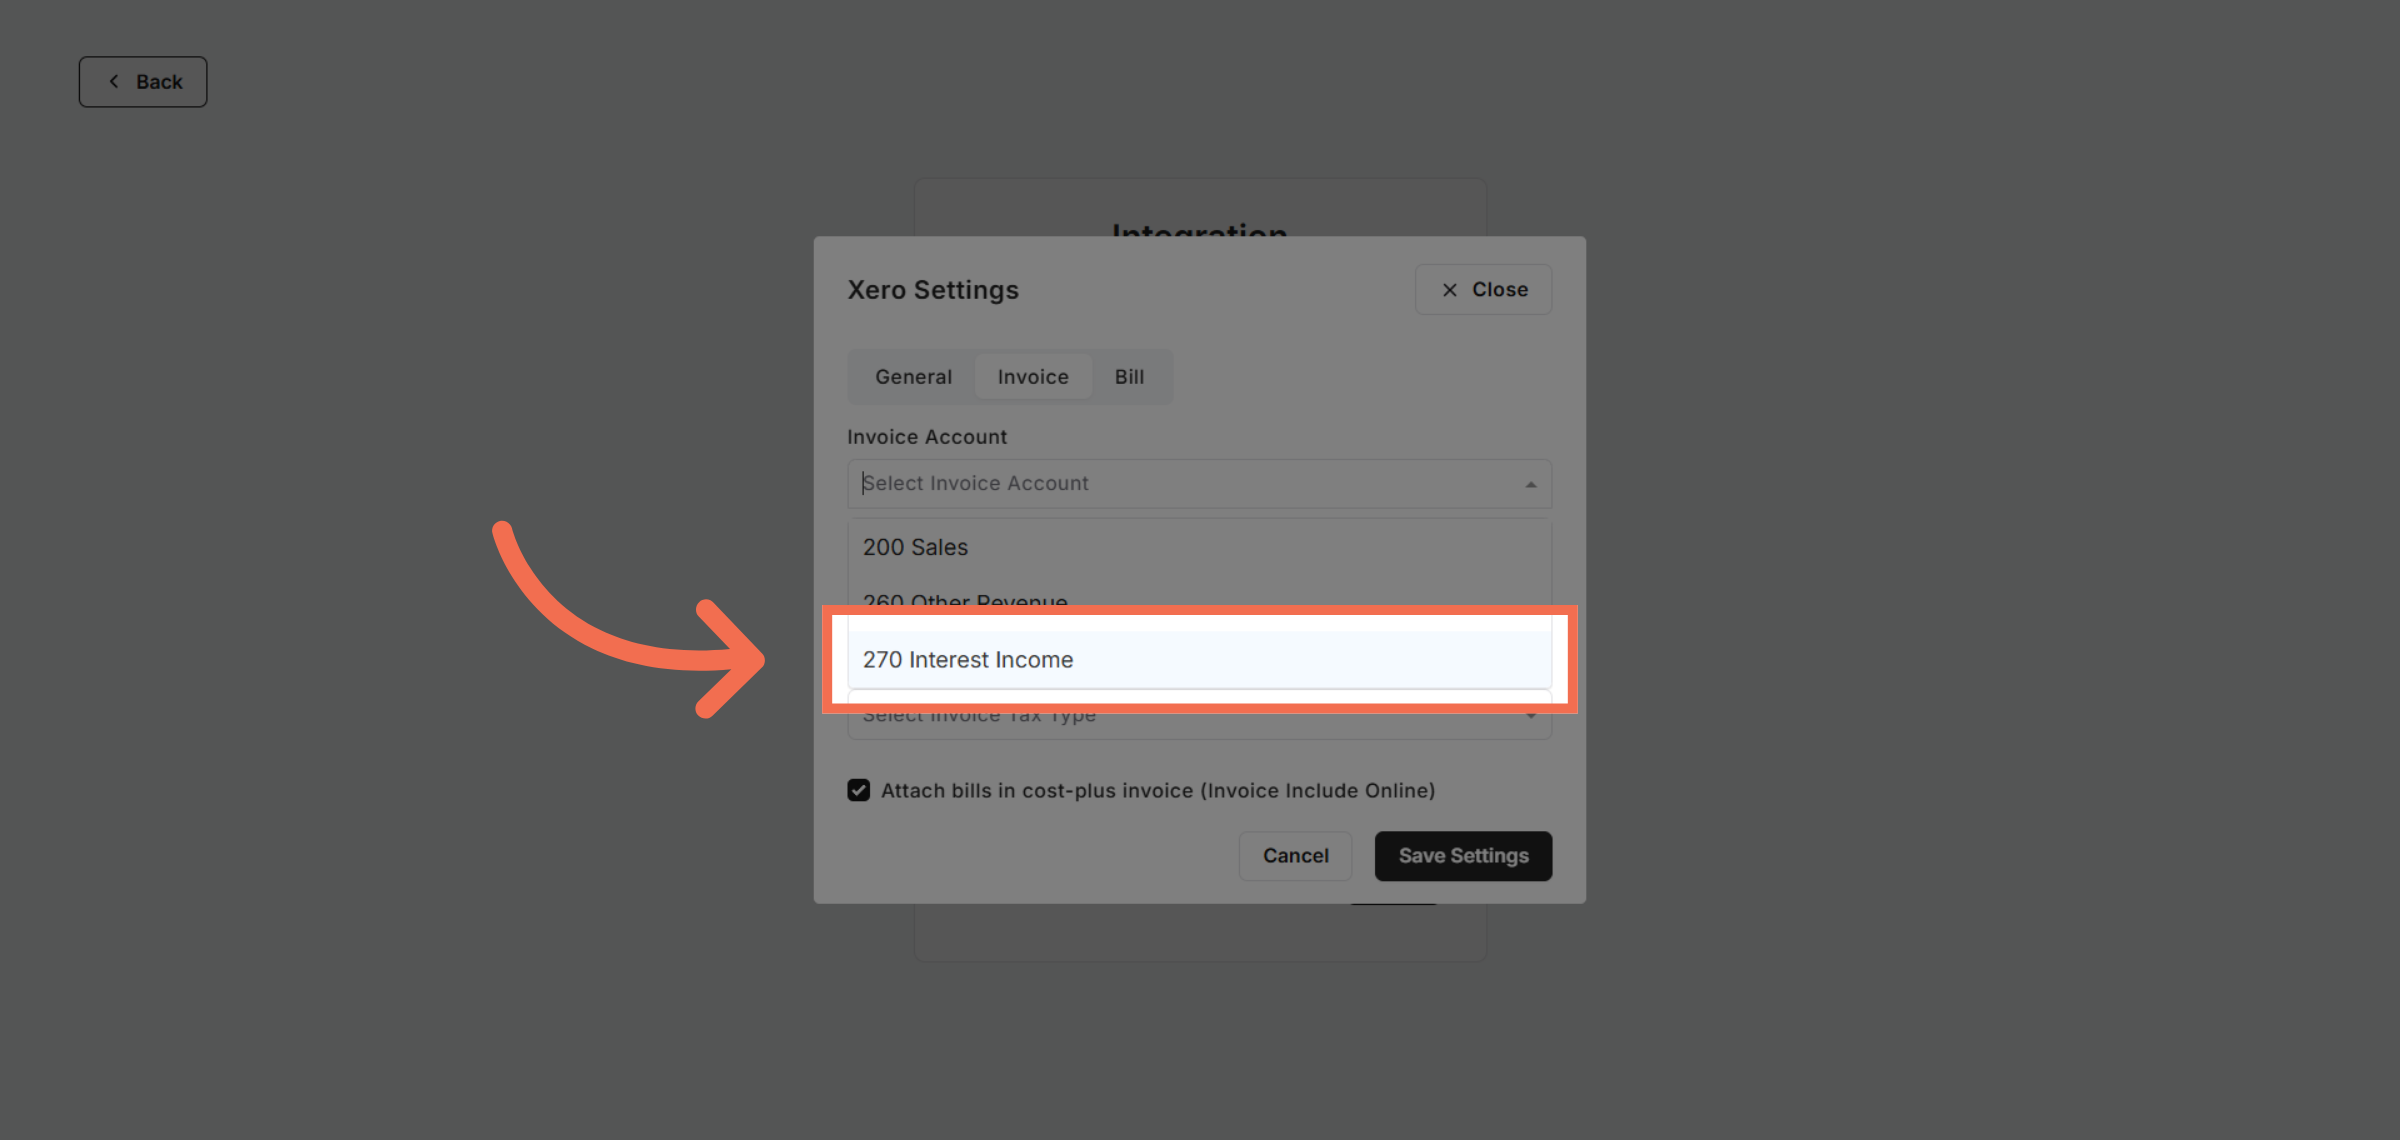
14. Select Invoice Account
Select the income account to categorize your revenue appropriately.
15. Open Invoice Status Options
Click here to access additional account configuration options.
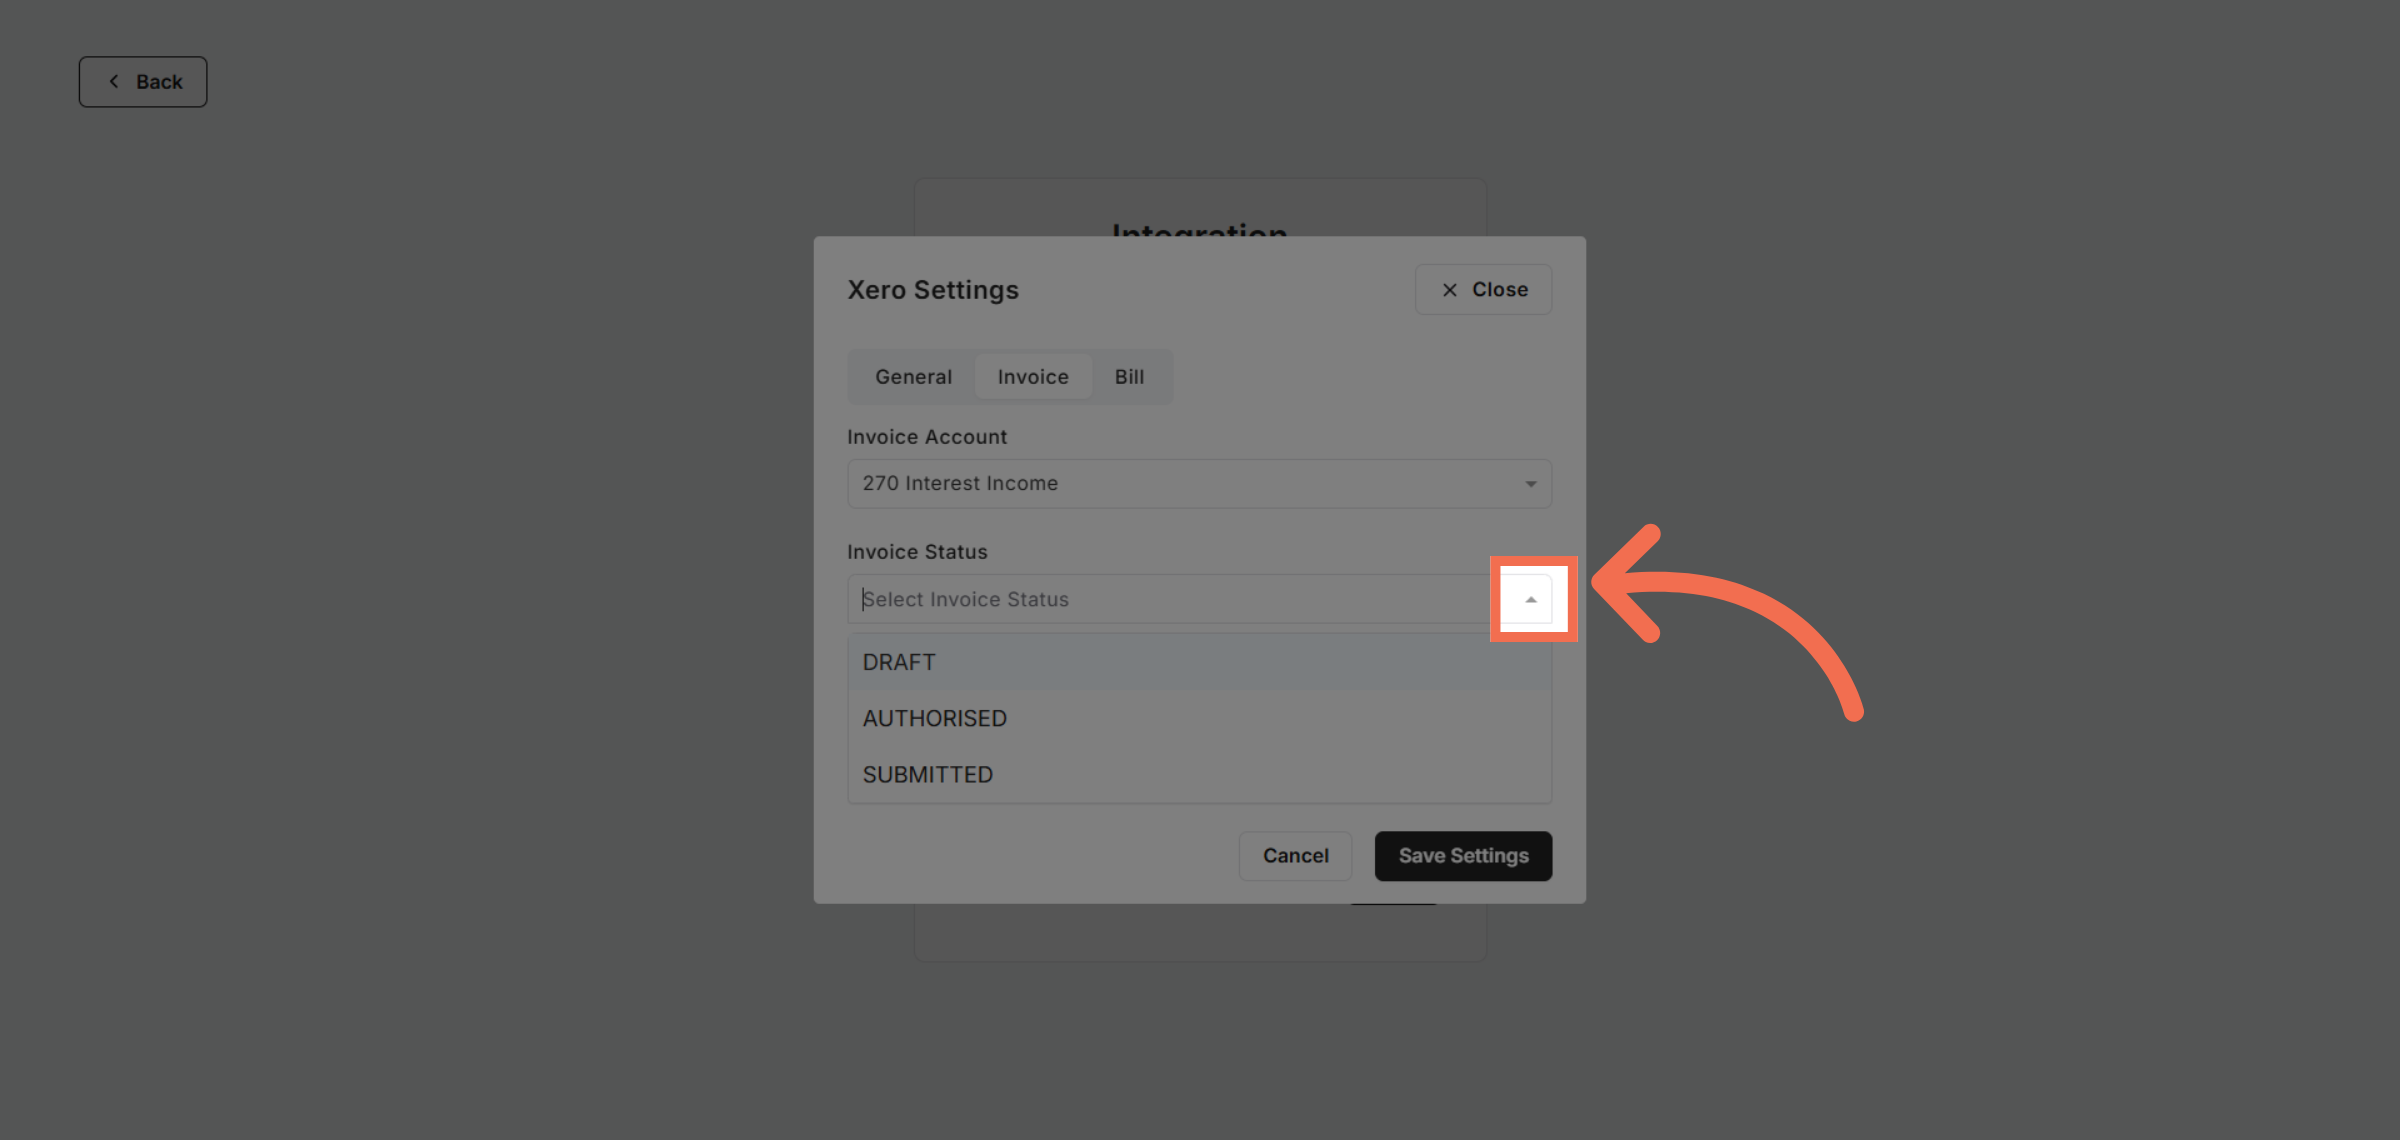
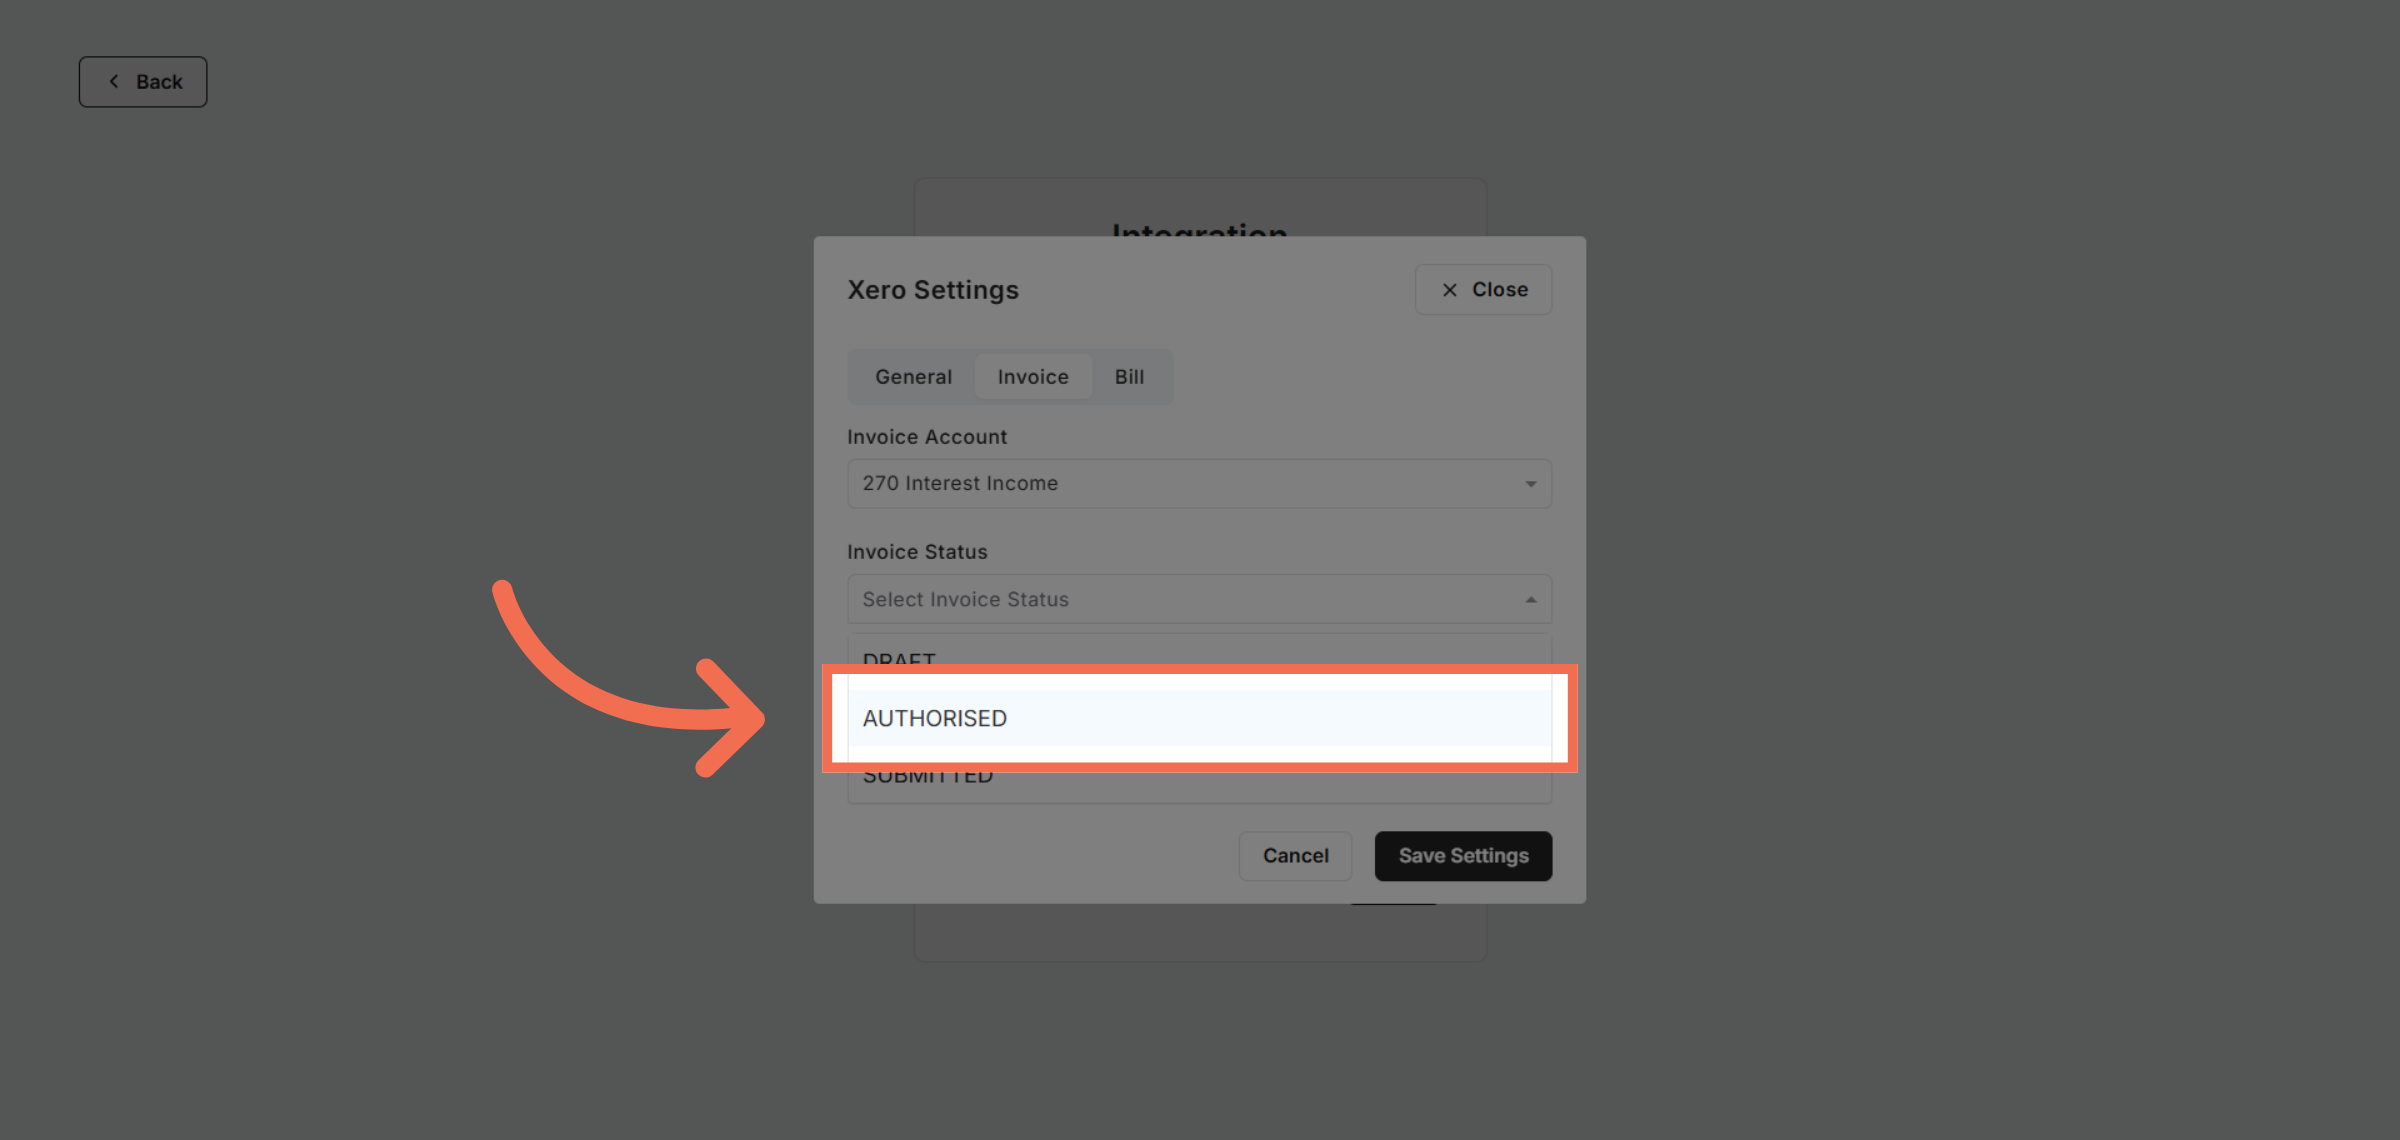
16. Choose Invoice Status
Click AUTHORISED to set the status for invoice processing.
17. Open Invoice Tax Type
Click here to modify tax-related options for invoices.
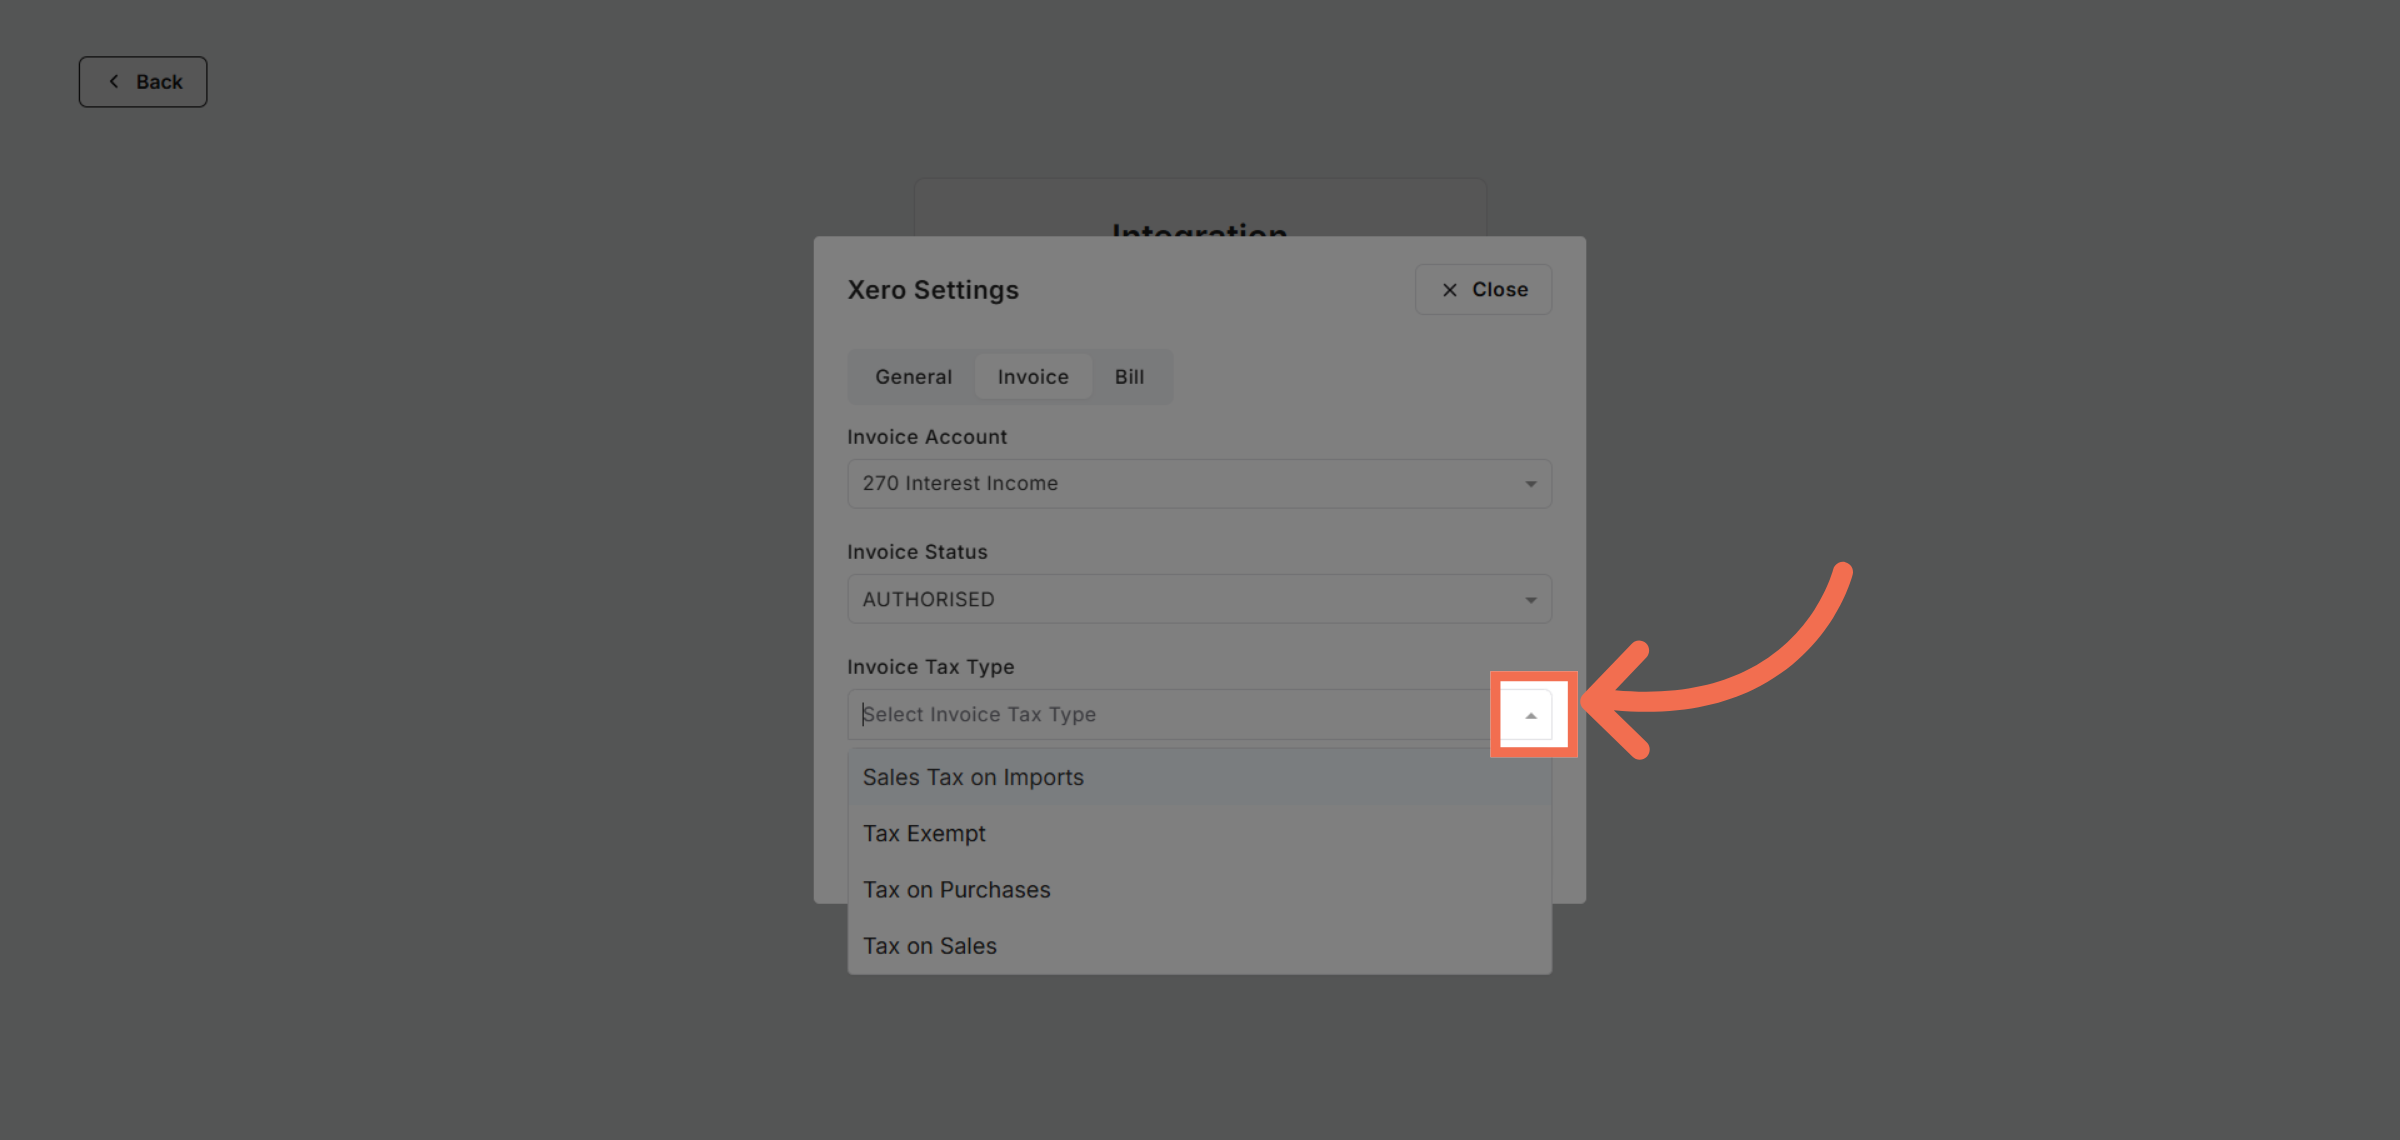
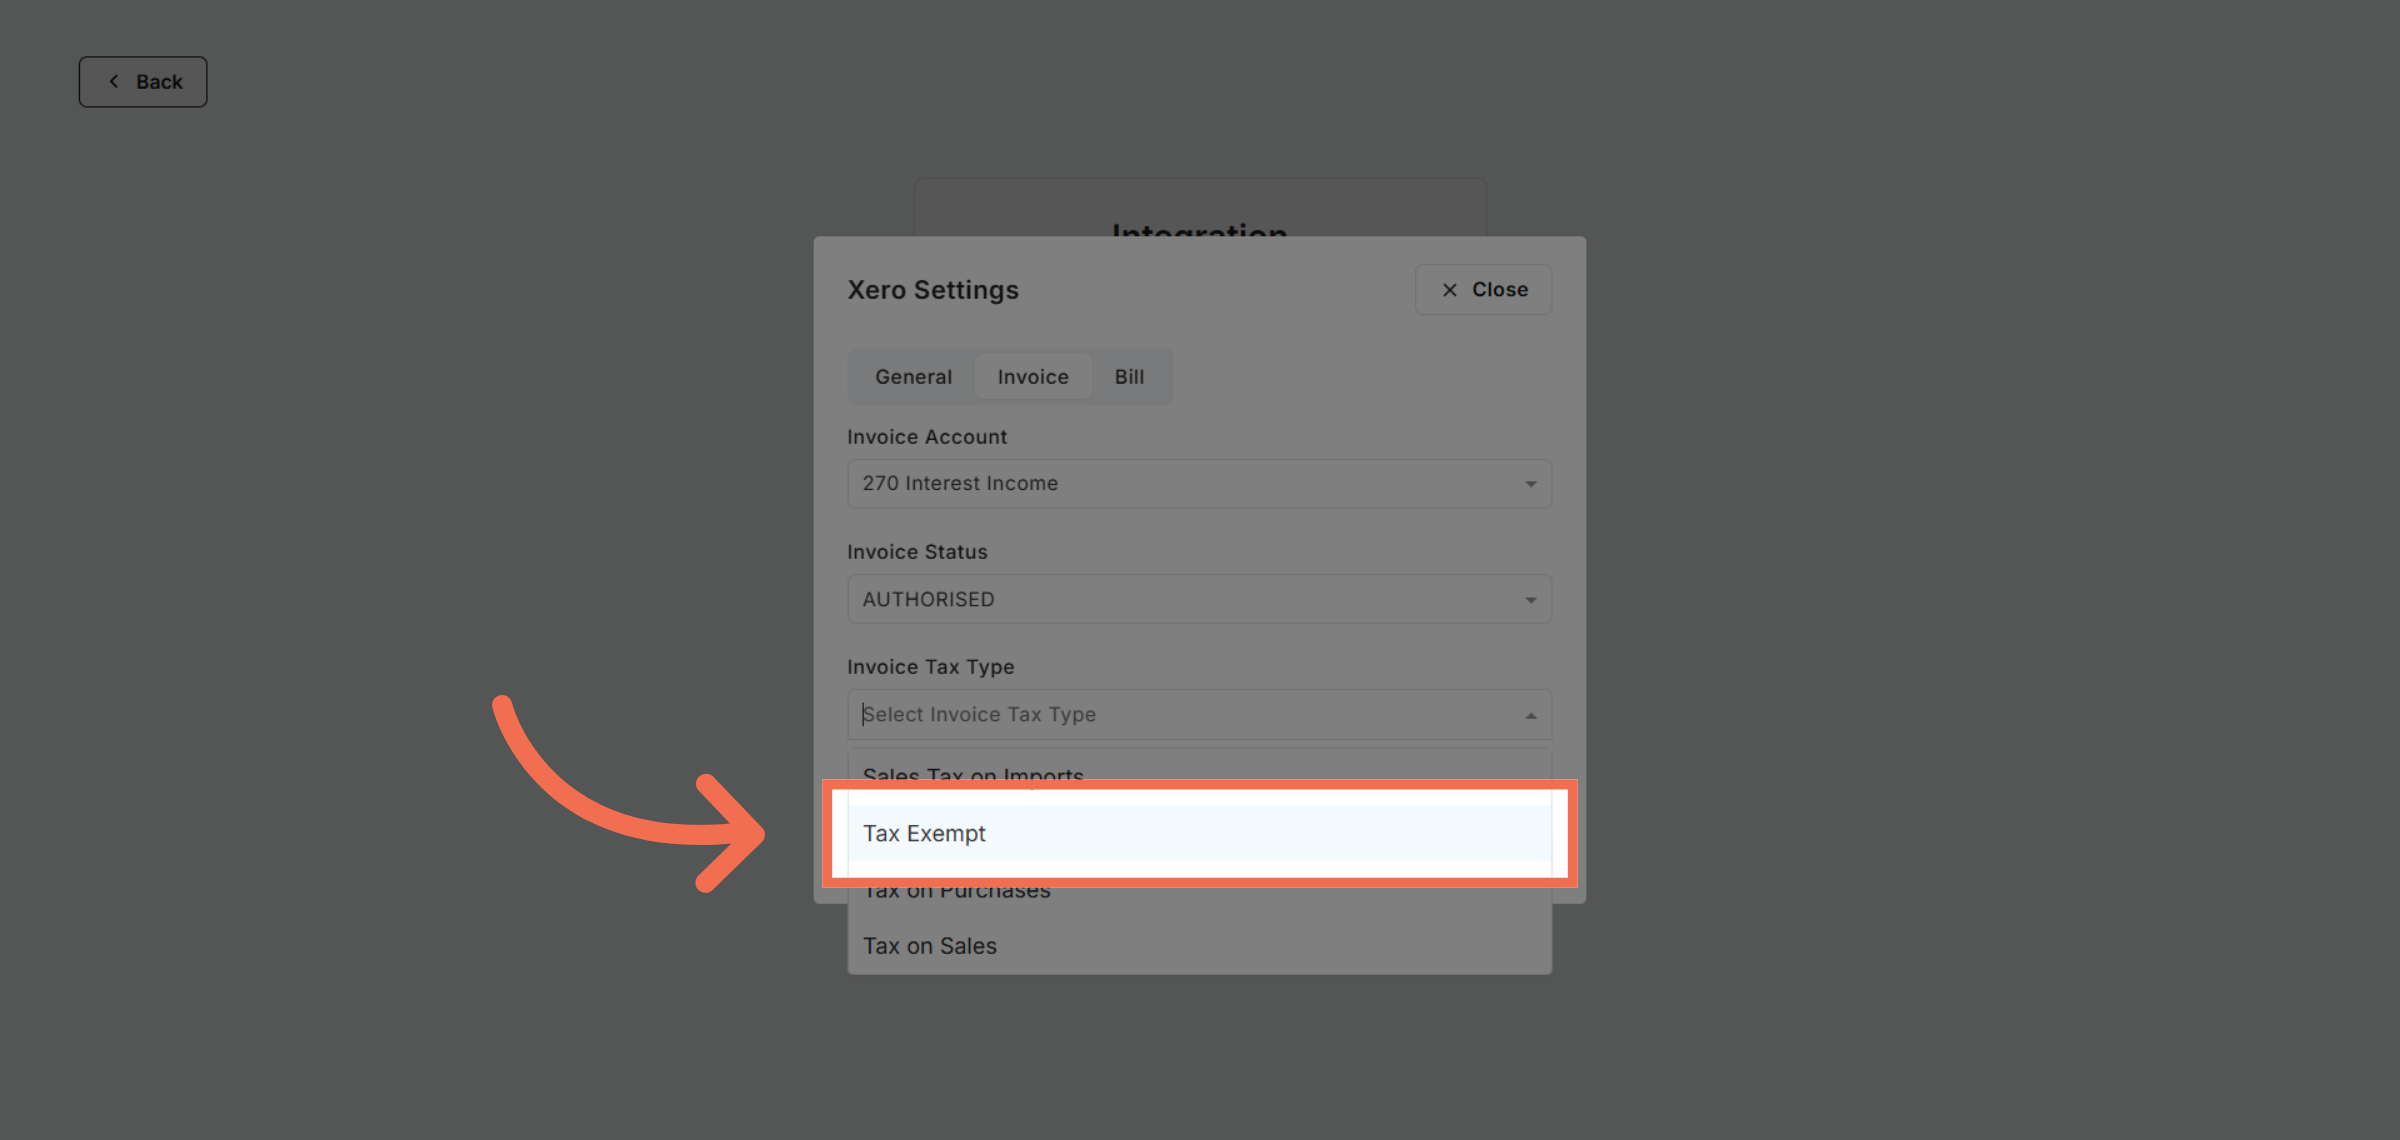
18. Select Invoice Tax Type
Click Tax Exempt to apply tax exemption status where applicable.
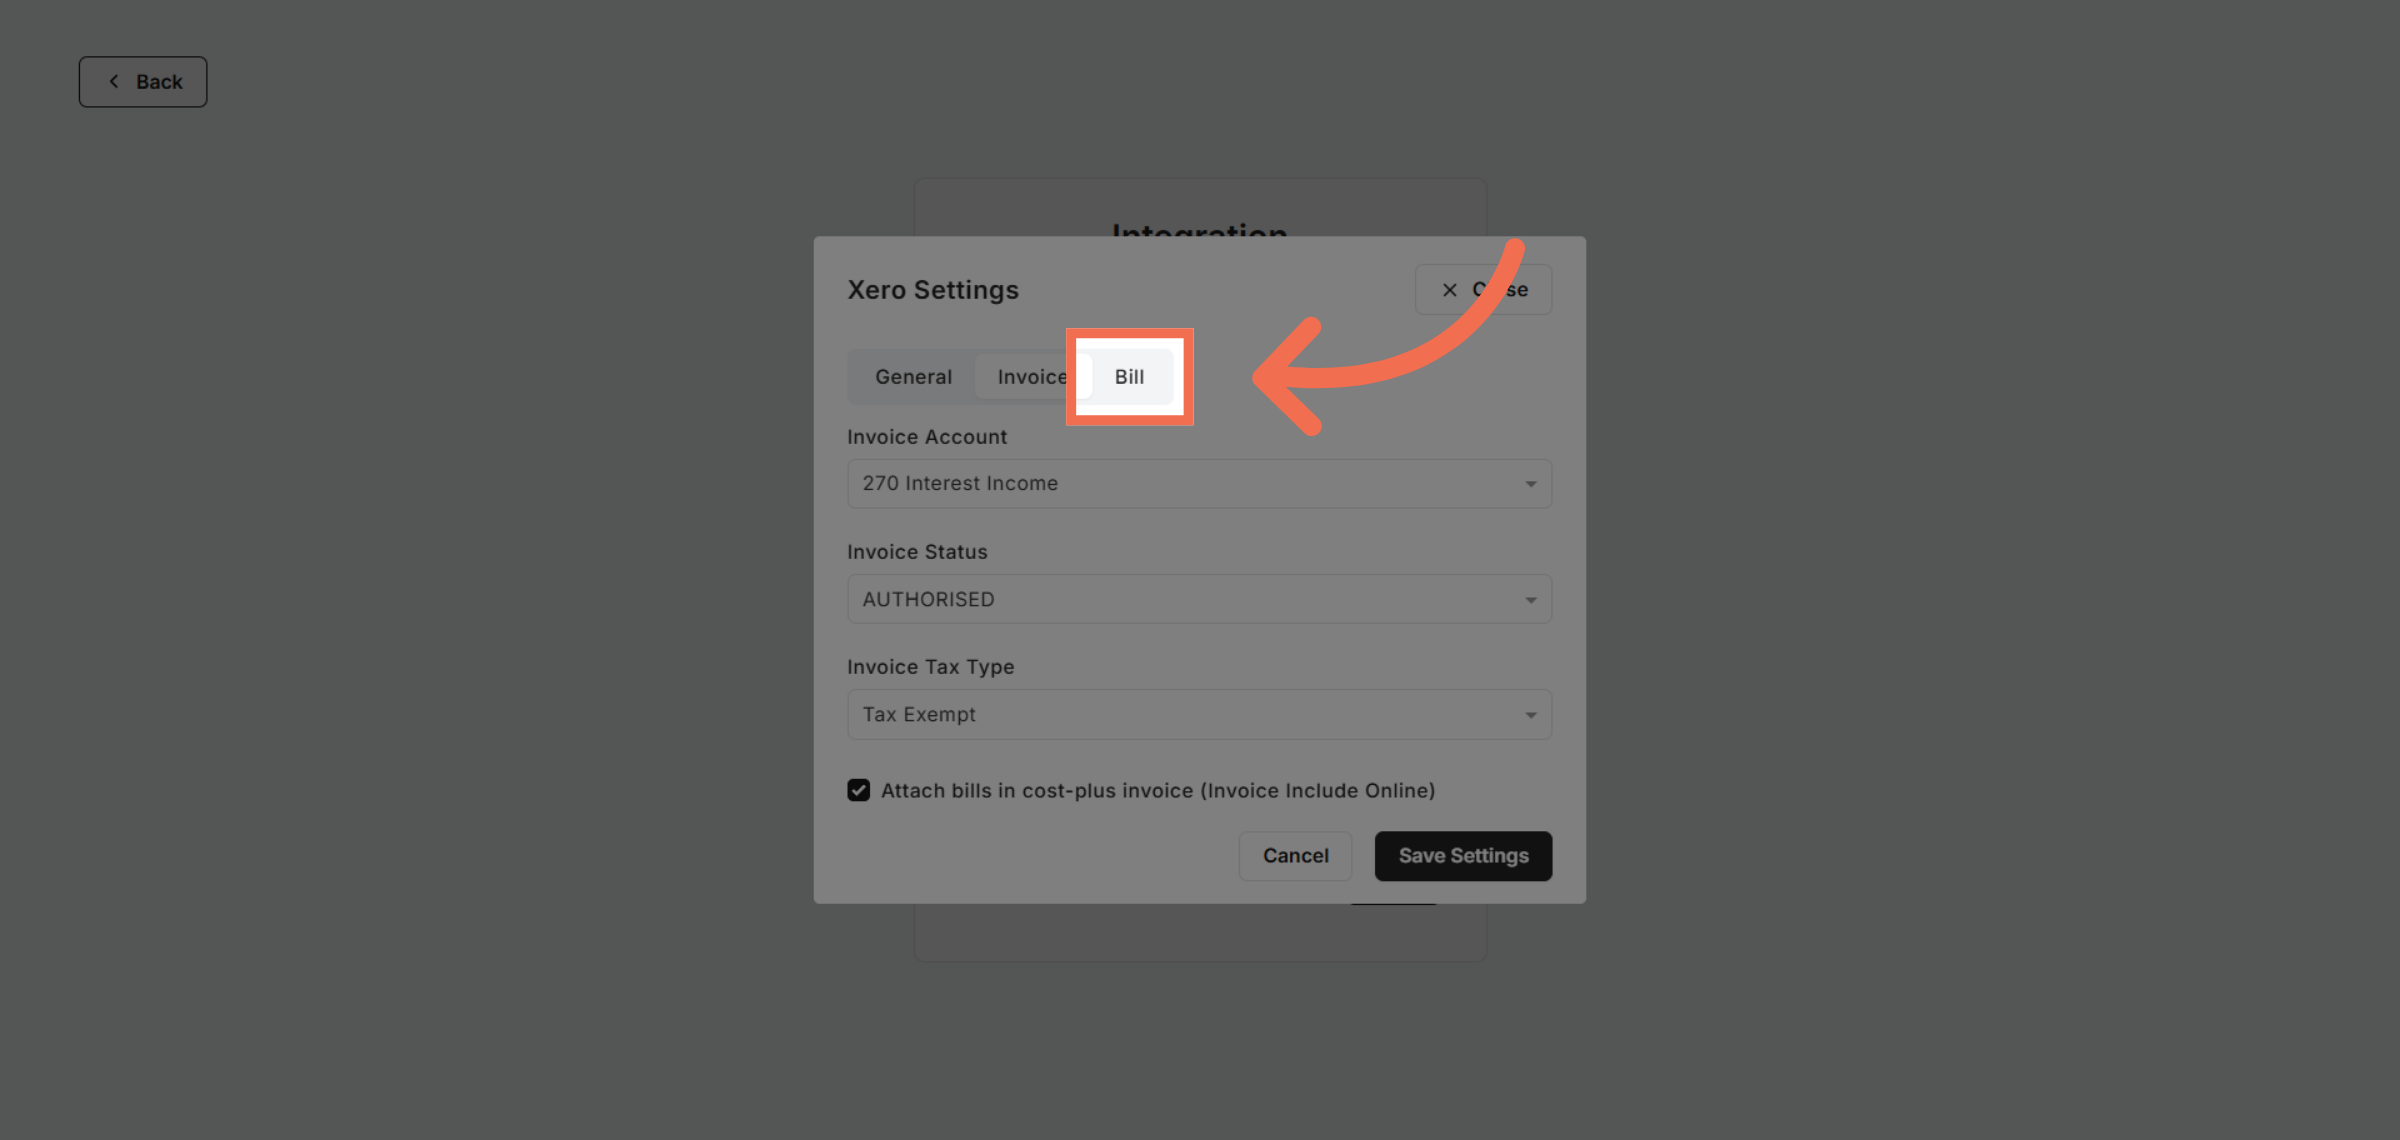
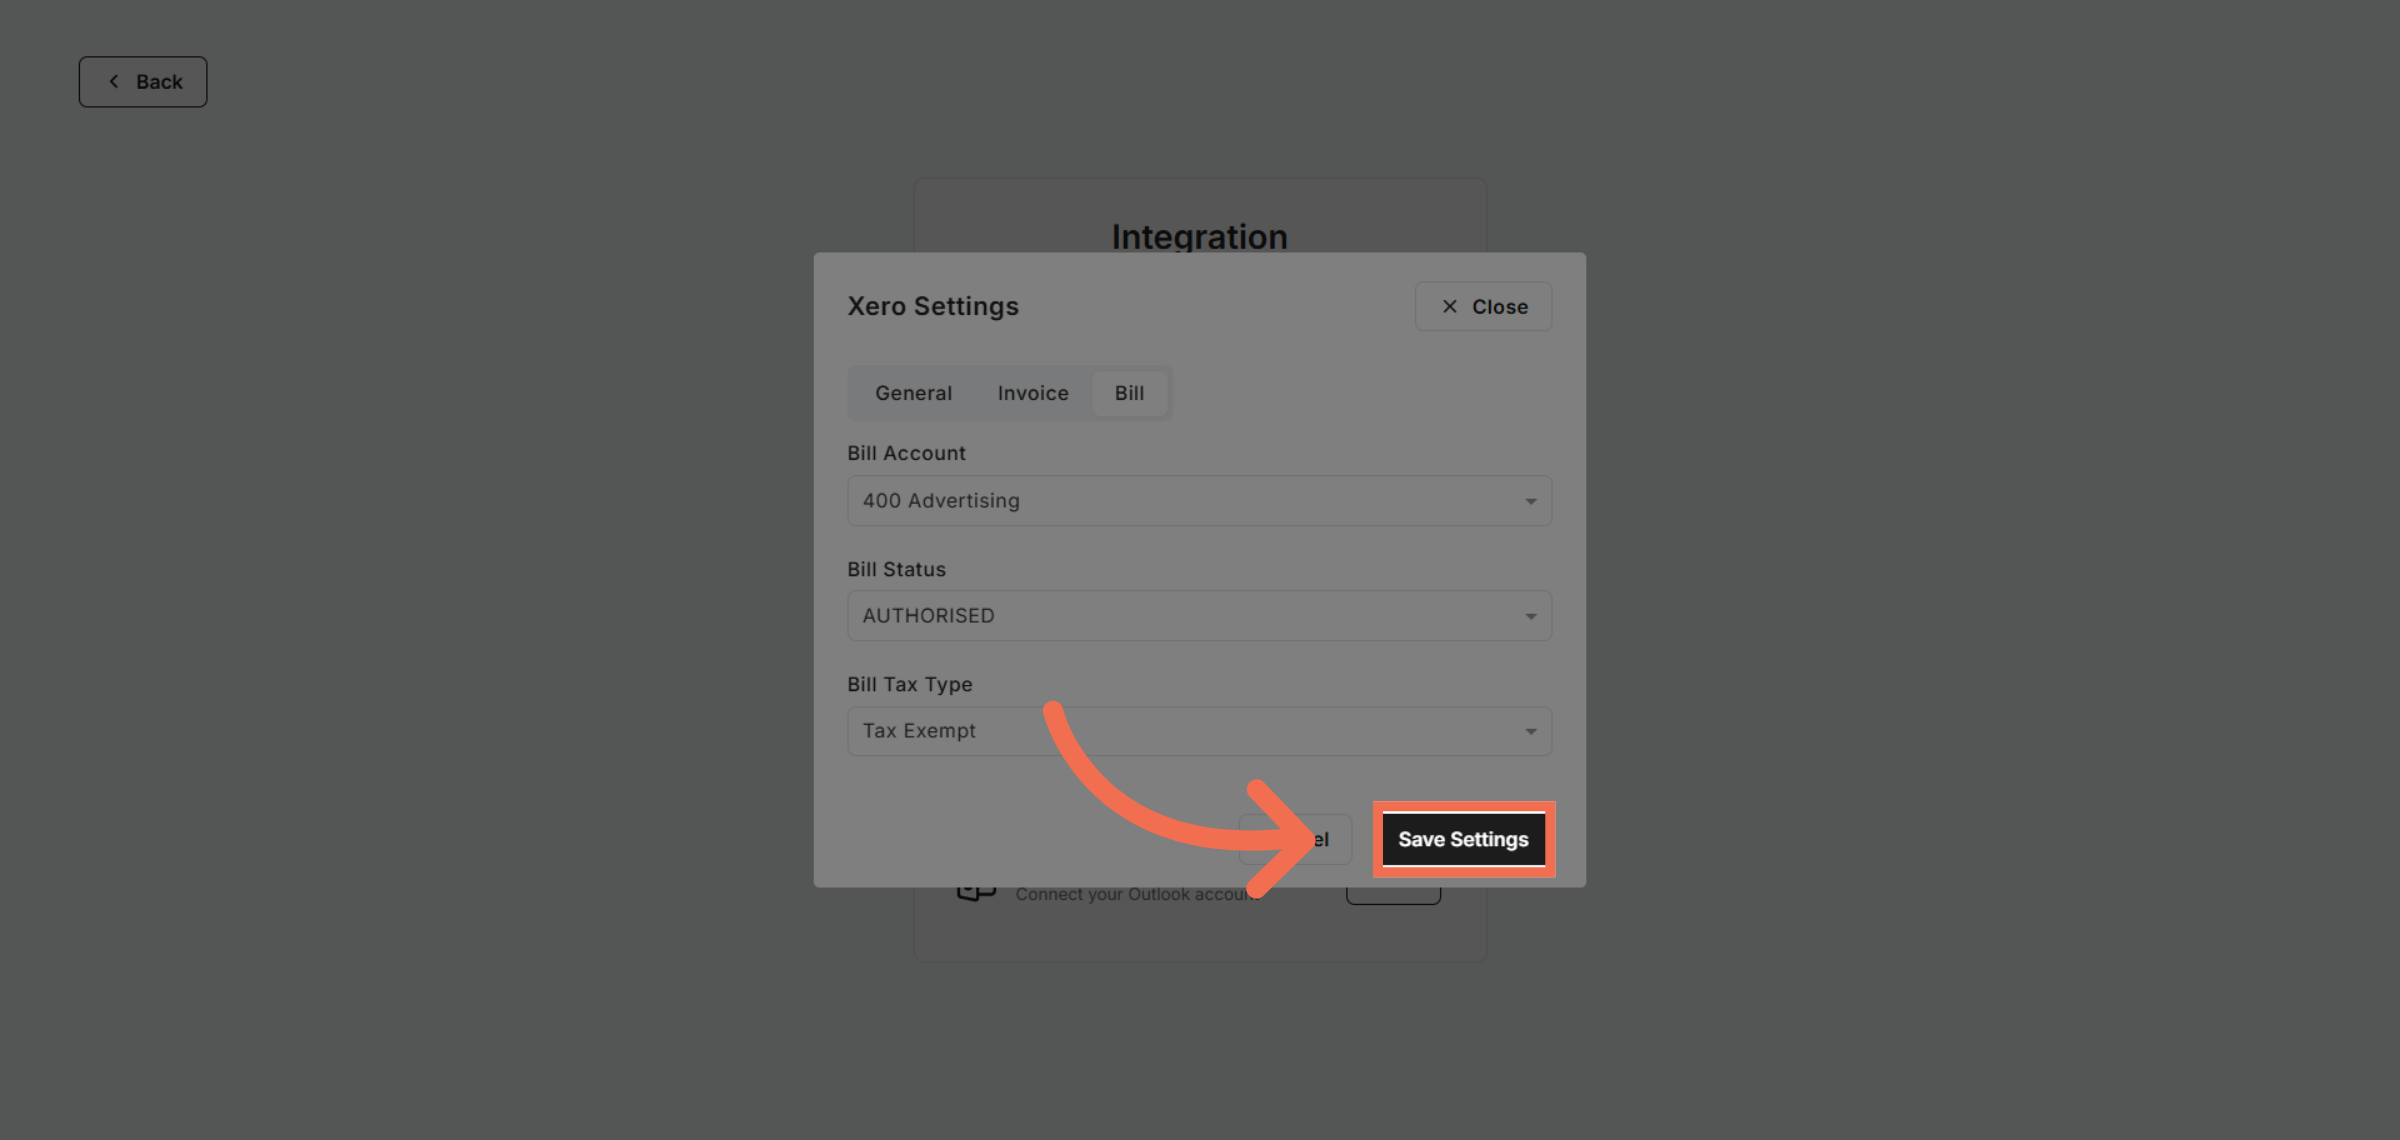
19. Select Bill Category
Click Bill to categorize expenses for accurate accounting.
20. Open Billing Options
Click here to access detailed billing settings.
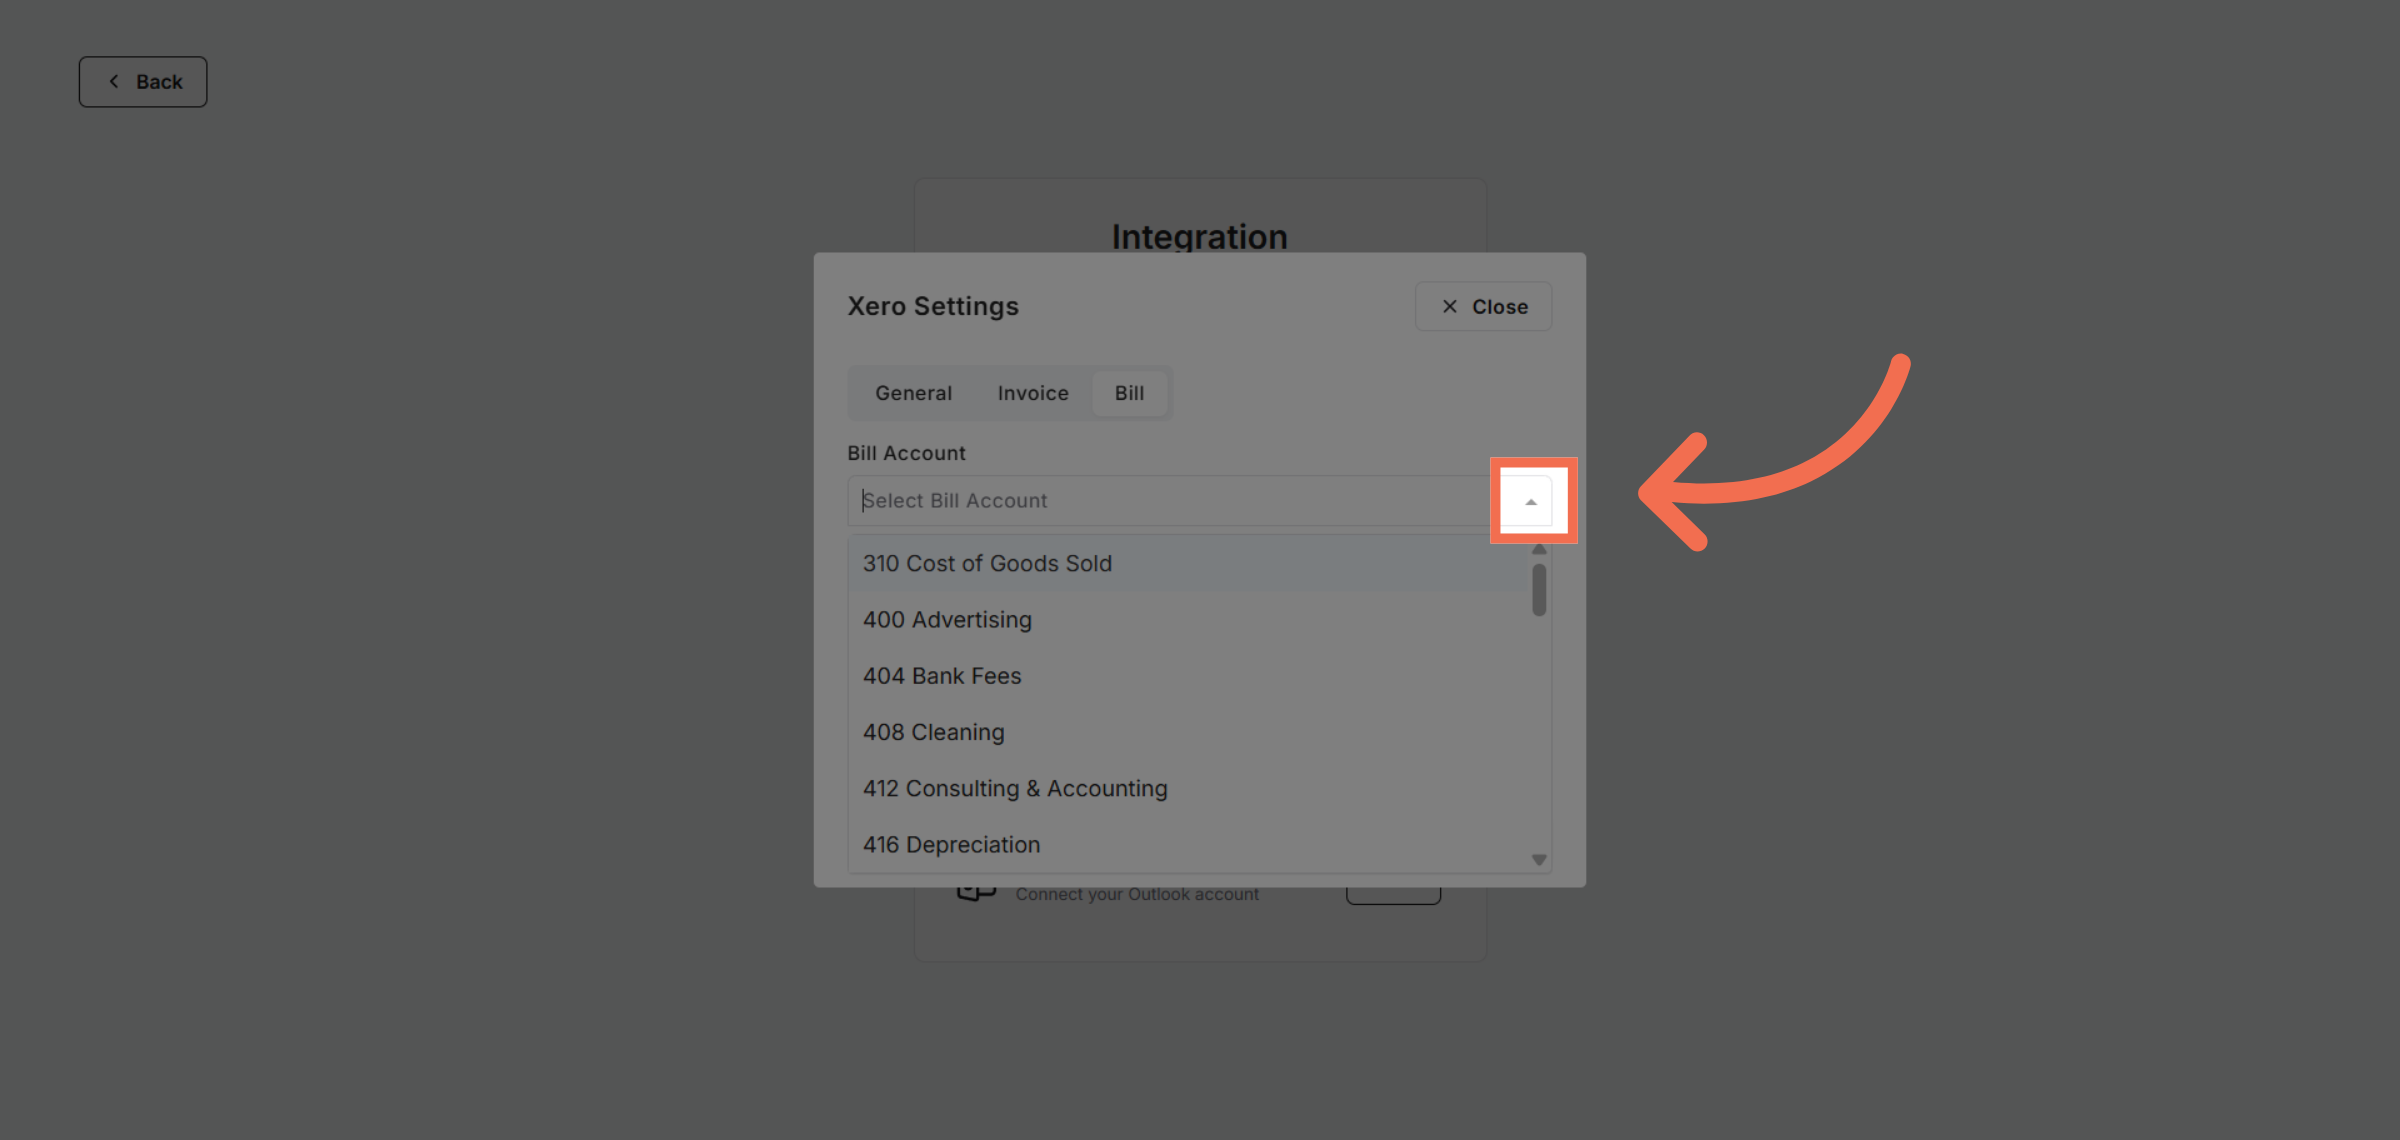
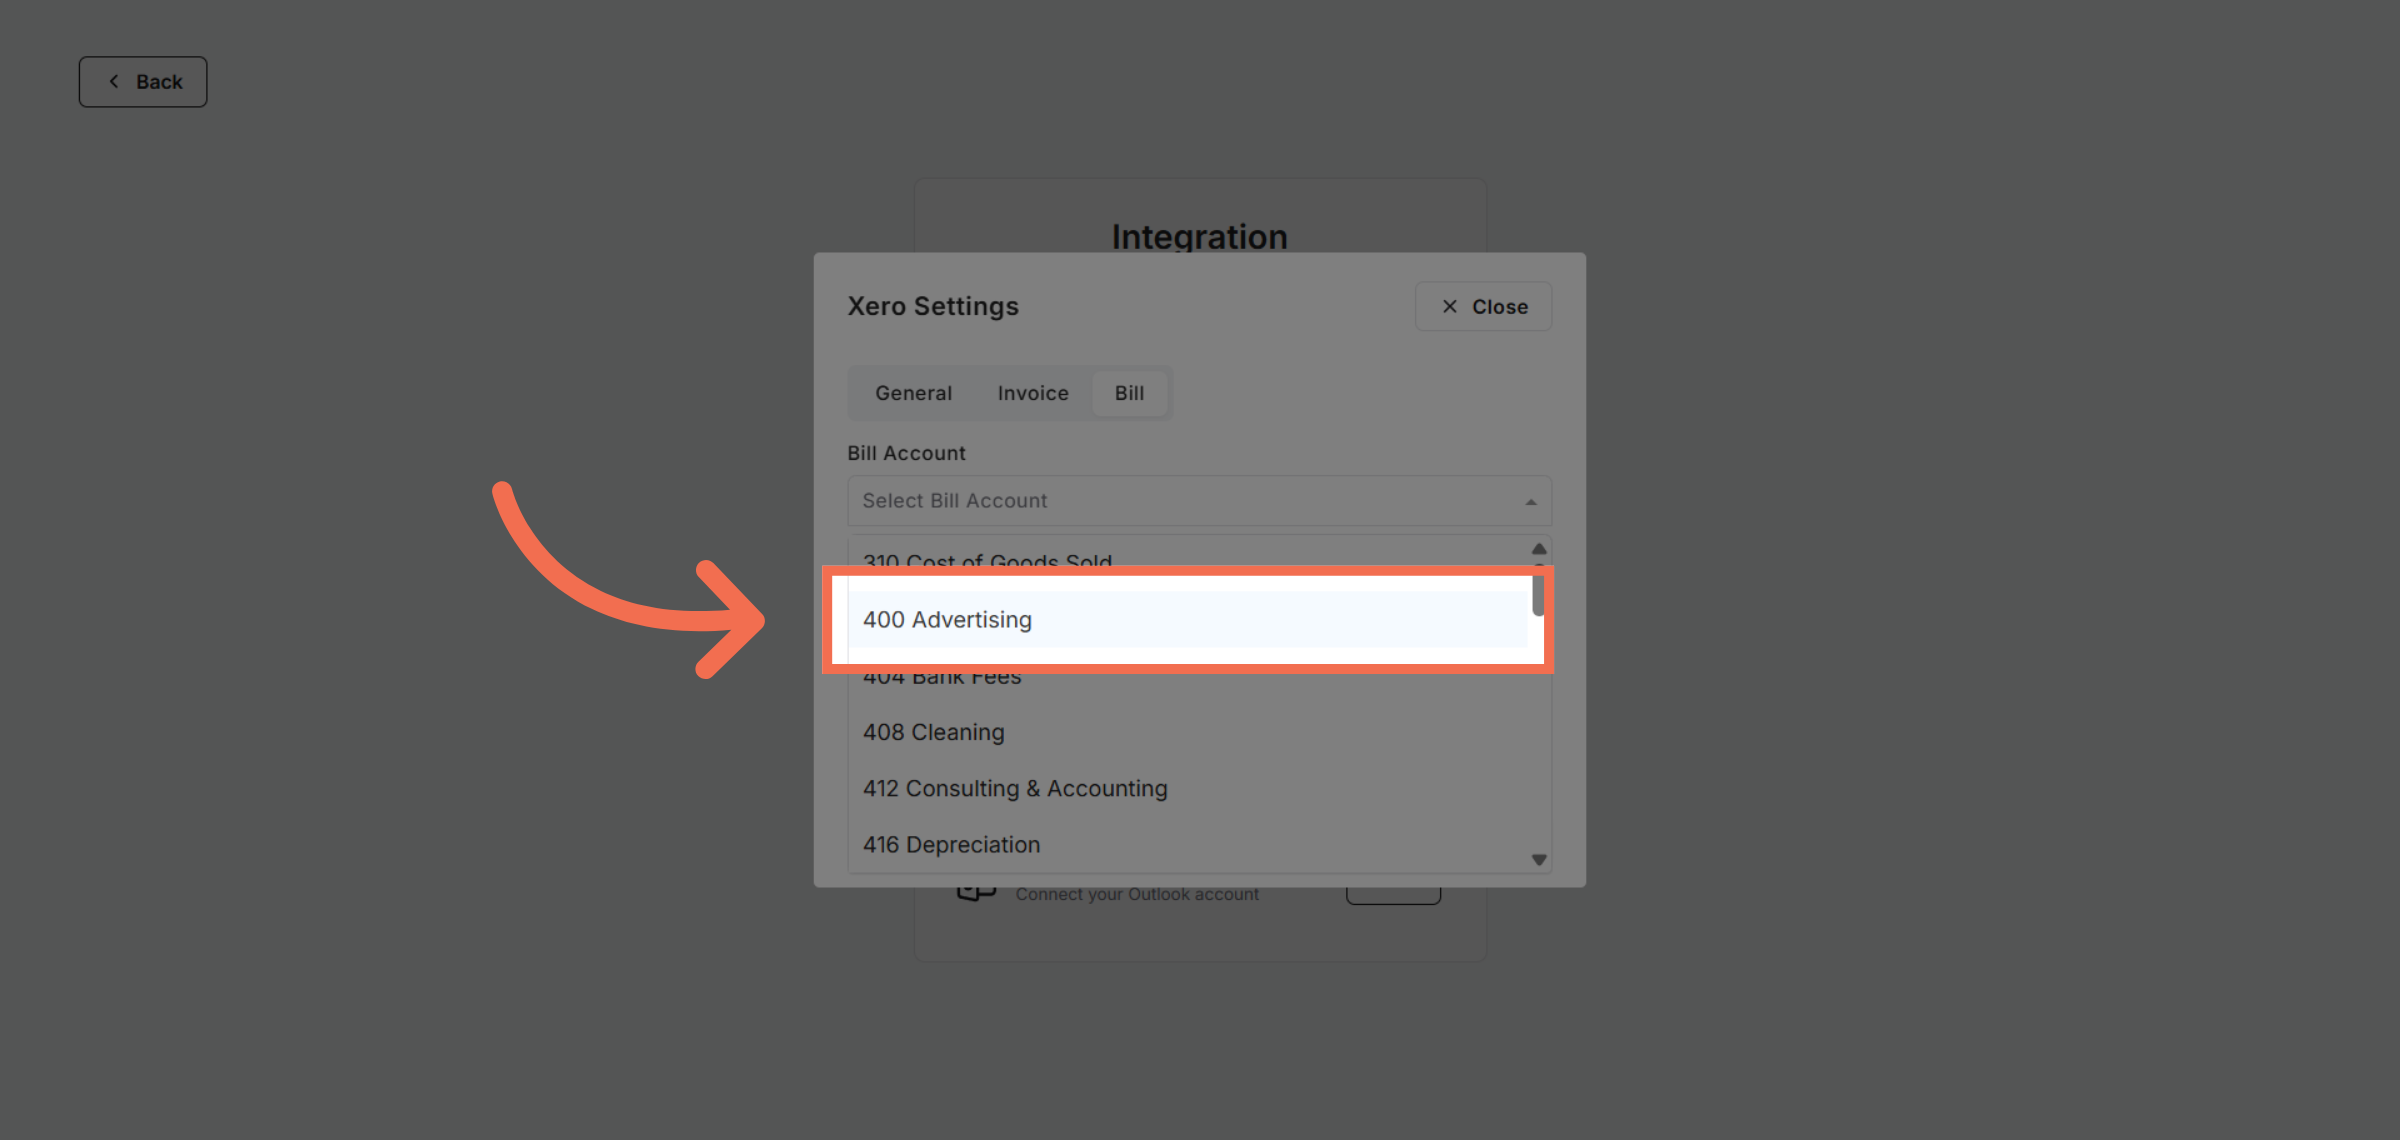
21. Choose Bill Account
Select the advertising expense account to track marketing costs.
22. Open Bill Status Options
Click here to configure expense-related options.
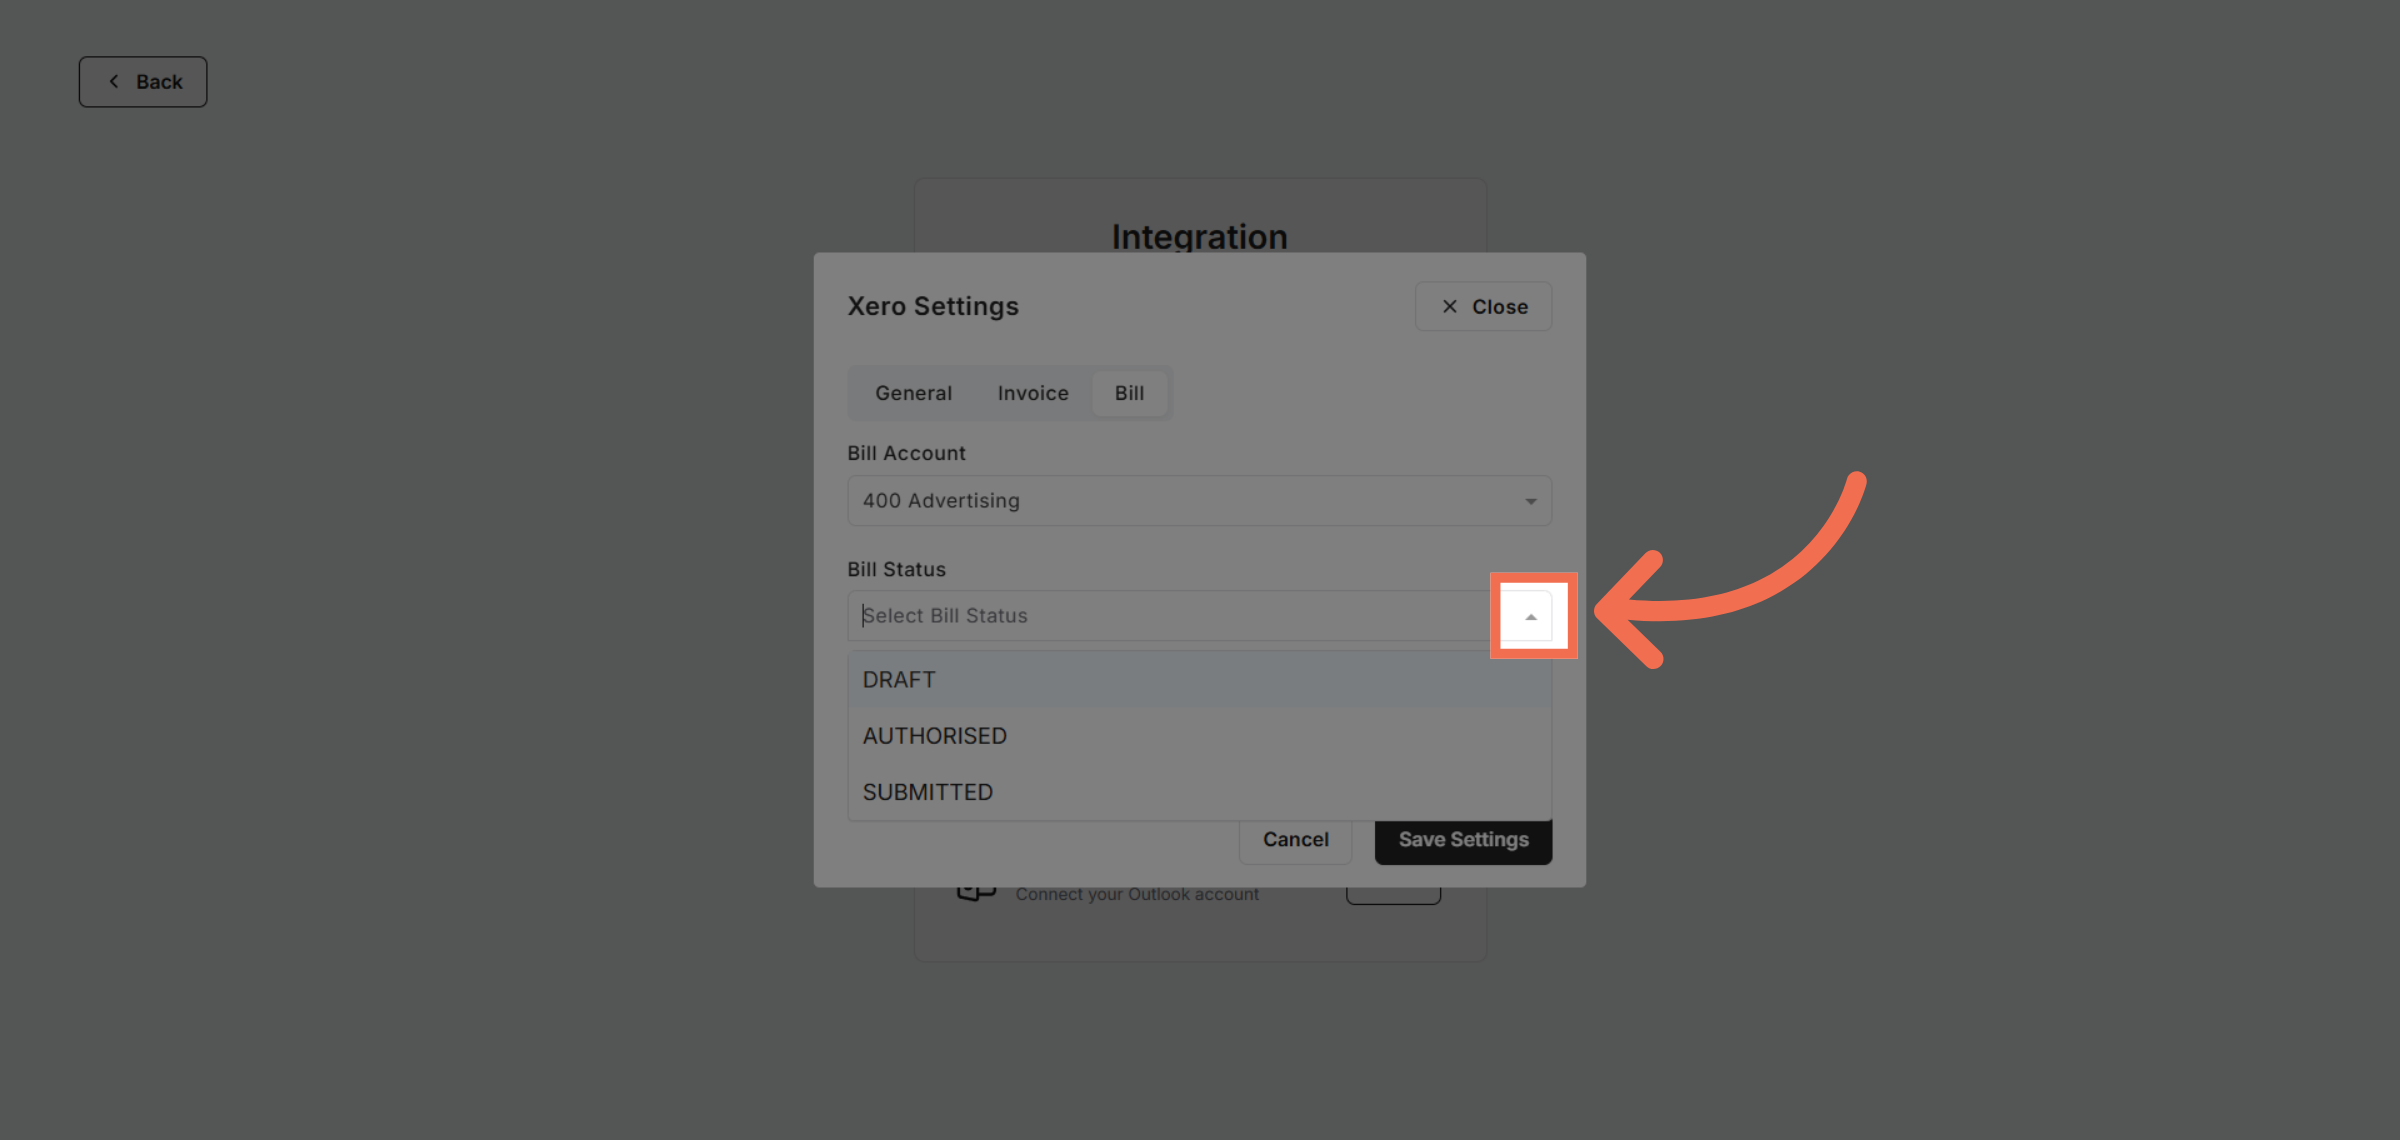
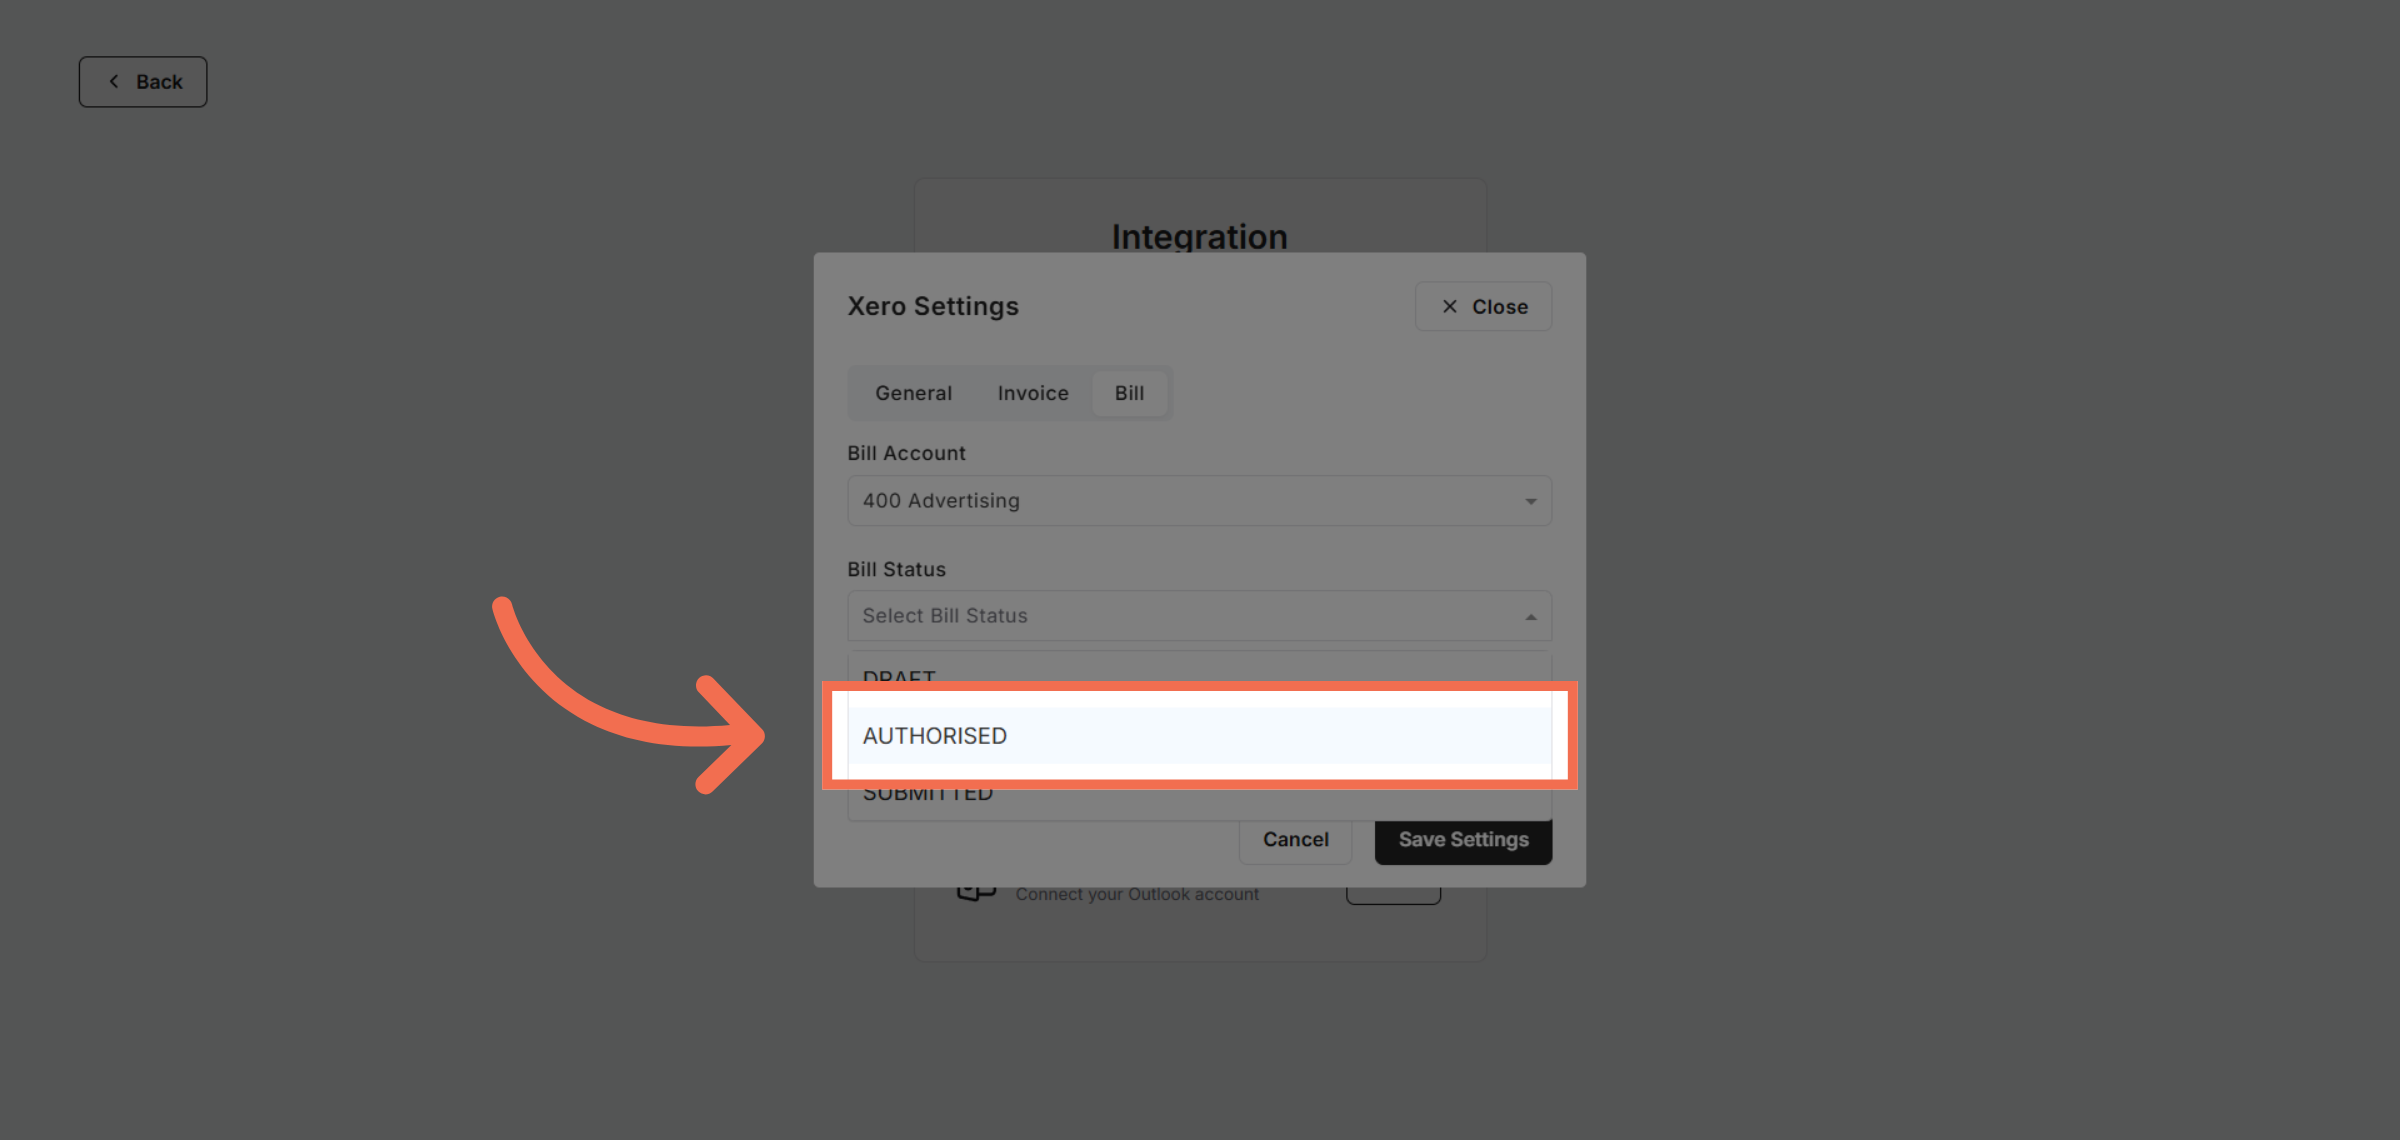
23. Select Bill Status
Click AUTHORISED to approve expense entries for processing.
24. Open Tax Type Options
Click here to adjust tax settings for expenses.
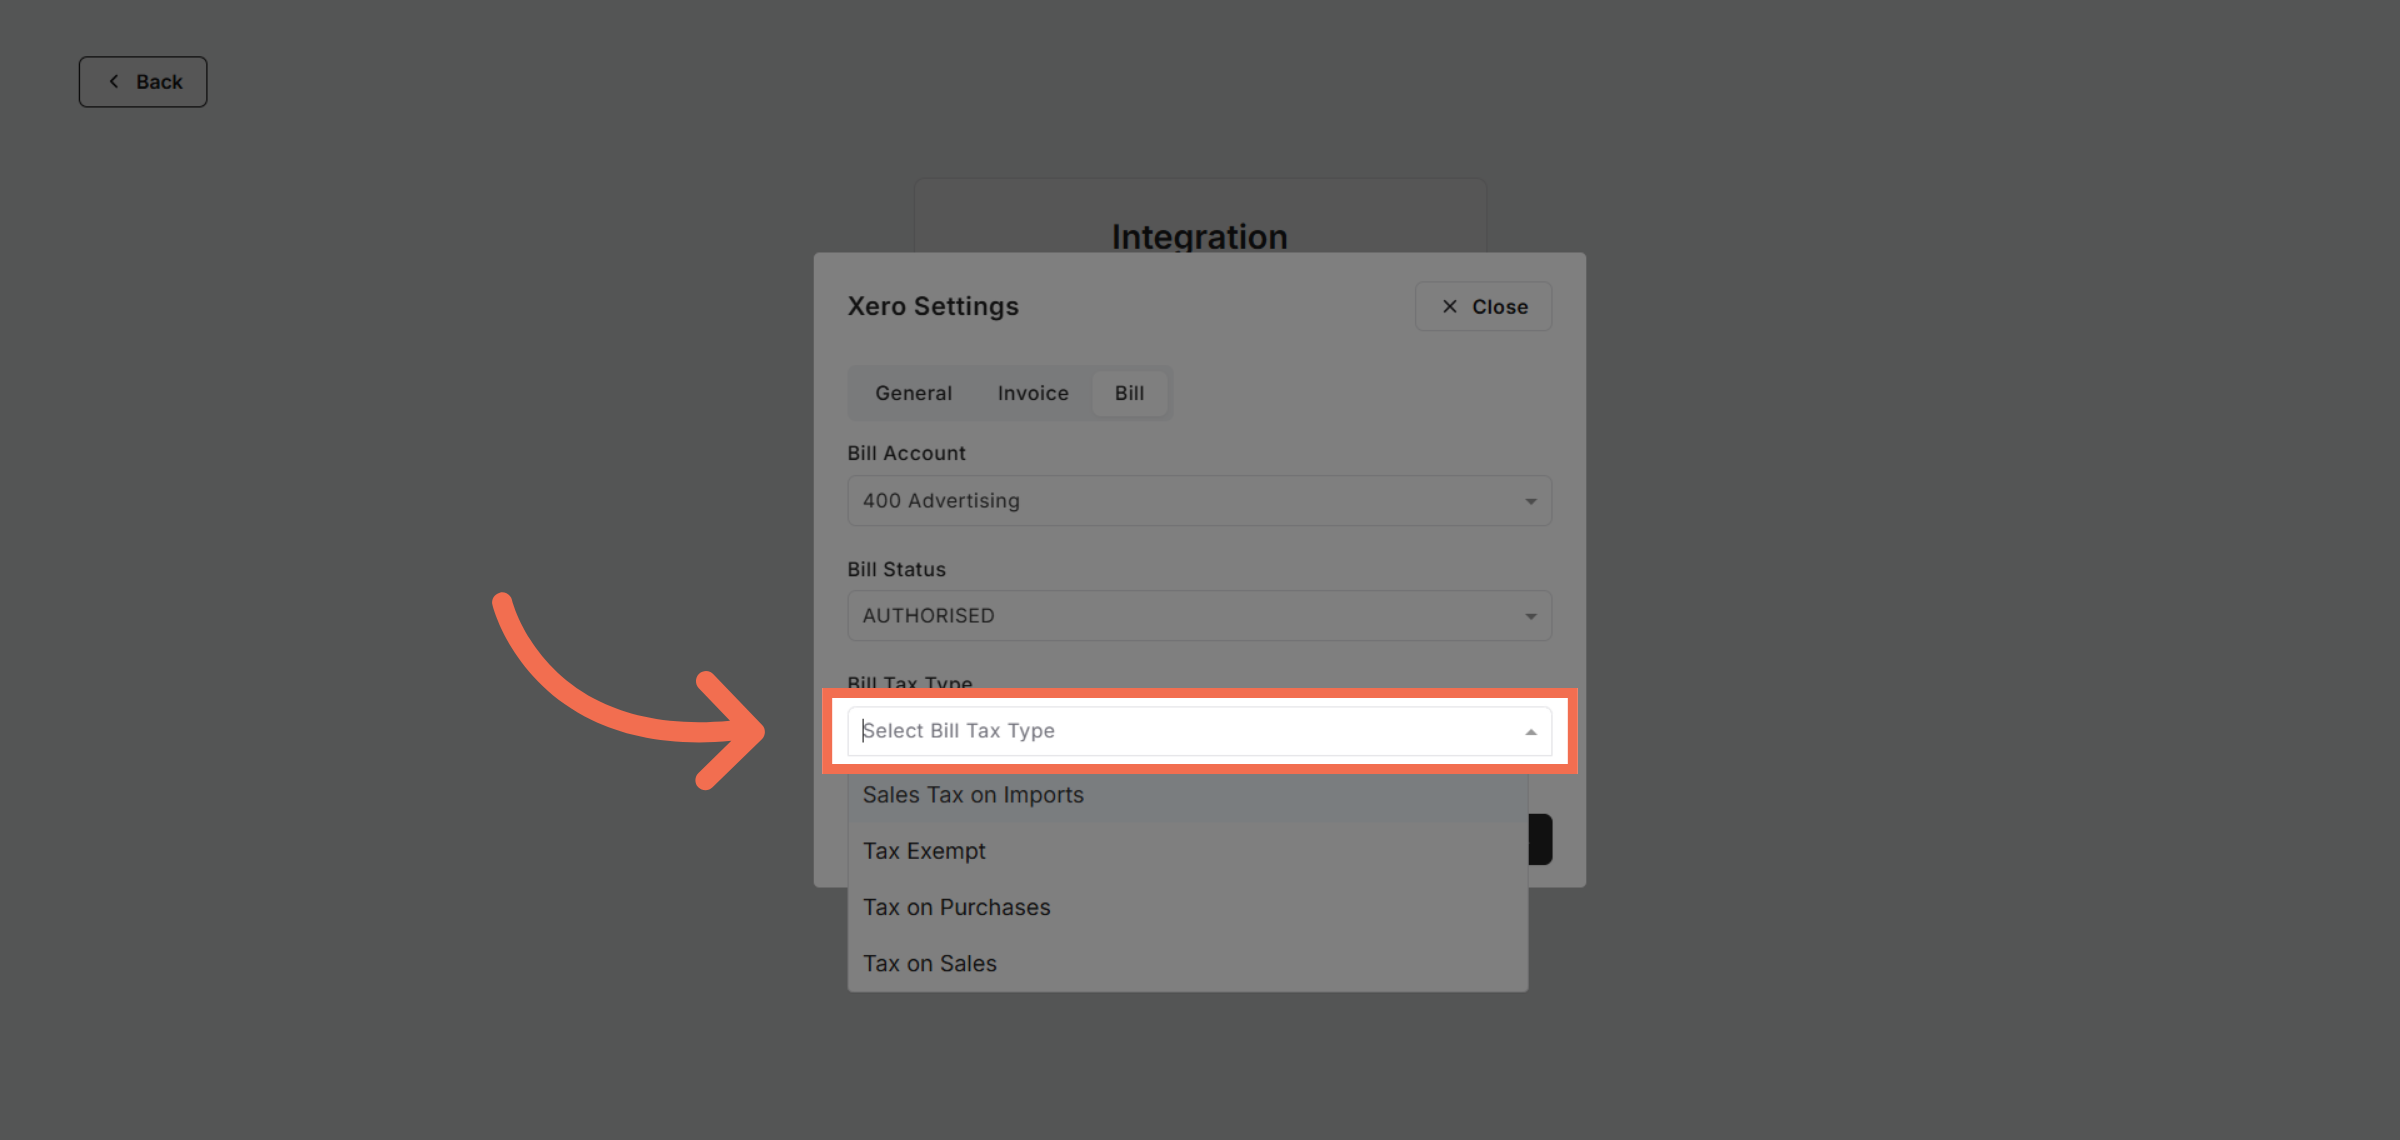
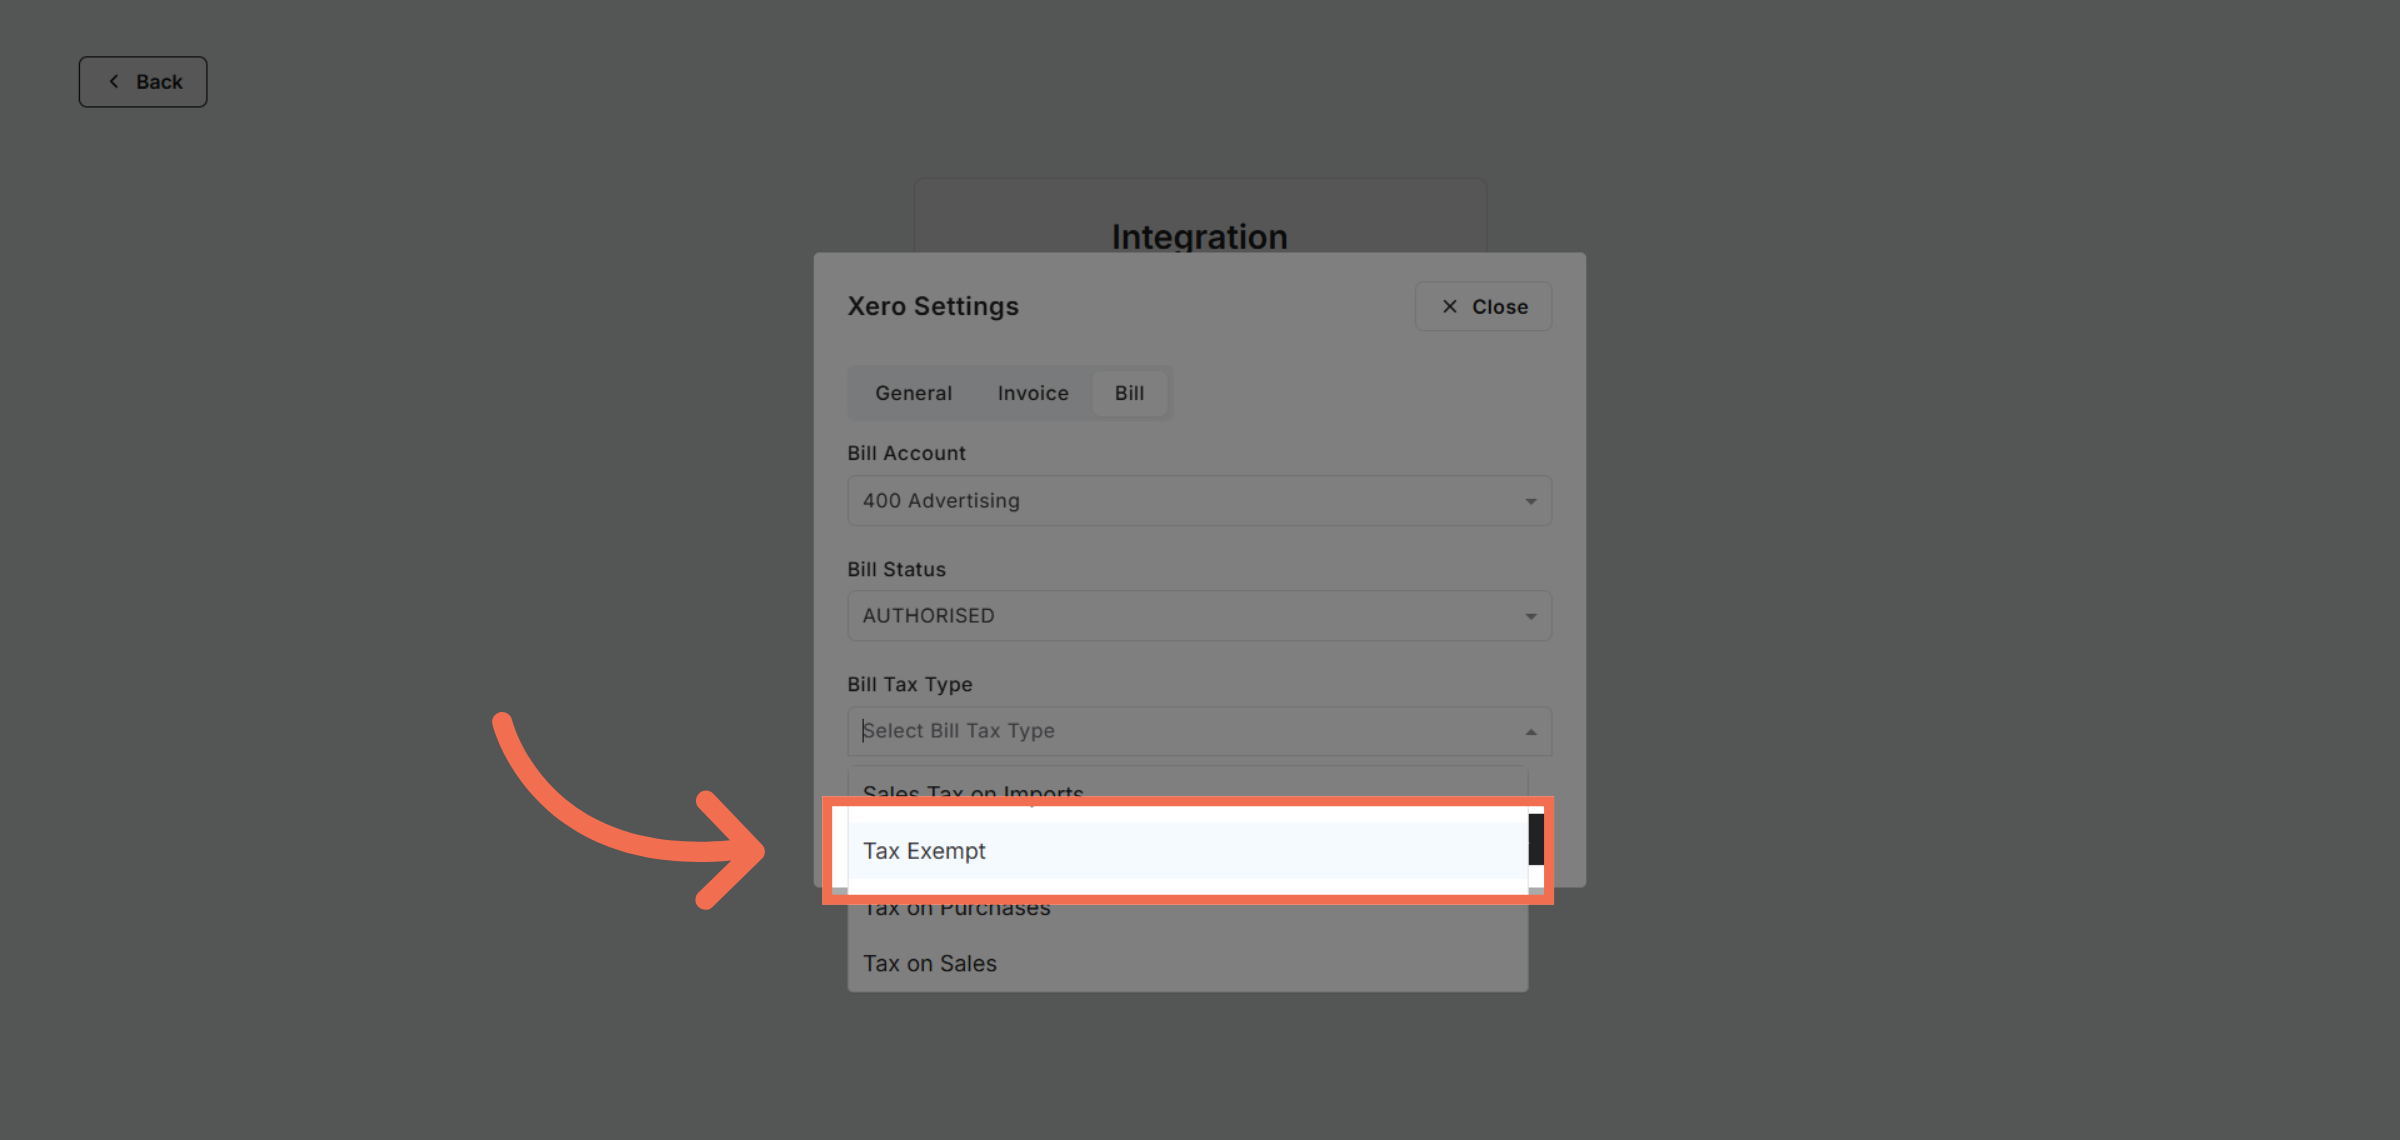
25. Choose Bill Tax Type
Click Tax Exempt to exempt specific expenses from tax.
26. Save Integration Settings
Click Save Settings to finalize and apply your integration configuration.
This demo demonstrated how to connect Readyteam with Xero and configure key settings for seamless invoice and billing management. Start your integration today to enhance financial workflow efficiency.